
How to create your first channel
Where to start
Everything about creating a new channel happens on one tab — it's called Create channel (the 🎯 icon at the top of the app window). Click it.
If the app isn't installed yet, first go through the Install and first launch guide.
What this tab looks like
On the left is a list of steps (the app walks you through them top to bottom). In the middle is the channel type choice: five big buttons. You don't need to click anything at random — first pick a type, then the wizard leads you by the hand.
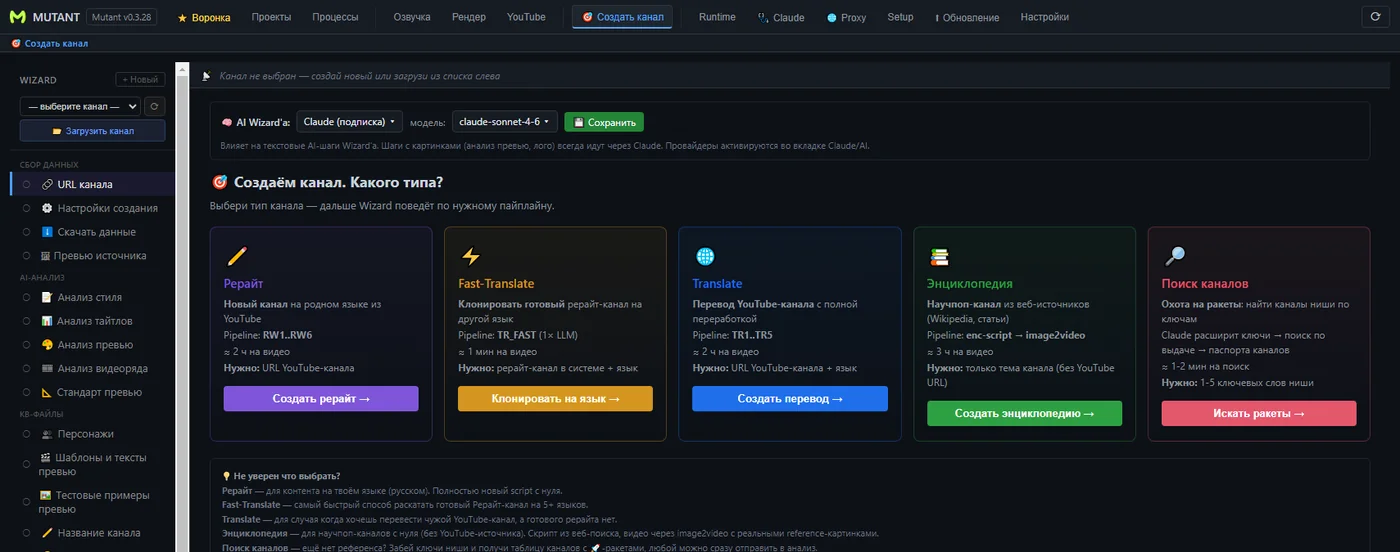
Step 1. Pick the channel type
This is the only decision to make at the very start. Five options — choose by what you have and what you want to get:
- Rewrite — you give a link to someone else's YouTube channel that you like, and the app makes your own channel in the same language. The texts are new and original, but in a similar style. This is the most common choice to start with.
- Fast-Translate — a quick way to take your already-finished rewrite channel and repeat it in another language. You only need this if you already have a working channel.
- Translate — takes someone else's YouTube channel and produces a translation into another language, fully reworked. Good for reaching a foreign audience.
- Encyclopedia — a popular-science style channel built from articles on the internet (for example, Wikipedia). No YouTube link is needed here — just name the topic.
- Find channels — for when you don't have an example to follow yet. You type a few words about your topic, and the app finds suitable channels you can then pick an example from.
Not sure what to choose? For your first channel, go with Rewrite — it's the clearest path: give a link to a channel you like and get your own.
Step 2. What to prepare
Before you begin, have these ready:
- A link to a sample channel on YouTube — the one whose format you like (for the Rewrite and Translate types). For Encyclopedia you just need a topic instead of a link; for Find channels, a few words about your niche.
- Being logged into YouTube in your browser — the app uses that to get permission to collect data. In plain terms: be signed in to YouTube in your usual browser.
A sample isn't a channel you copy word for word. It's an example of style and topic that the app uses to build the rules of your channel.
Step 3. The wizard takes it from here
After you pick a type, the app goes through the steps in the list on the left, one by one:
- Collects data about the sample from YouTube.
- Analyzes the topic, titles, thumbnails, and style.
- Sets up the channel's rules together with you — how to write the texts, what the thumbnails look like, which voice narrates.
- Adds the finished channel to the app — after that it starts producing videos.
Tip for the first time: choose the "manual" mode (the app offers it in the creation settings). Then there's a pause after each step — you can calmly look at the result and not miss anything.
What's next
Once the channel is created, it appears in the main list and is ready to make videos. How to start releases and keep an eye on them is in the Funnel tab guide.