
How to connect a YouTube channel (OAuth)
What this is
This guide walks you through every step of connecting a YouTube channel to Mutant: from the first click on the "YouTube" tab to publishing your first video. There are a lot of steps, but each one is just a click or copying a link. Follow them in order, don't skip any.
Step 1. Open the YouTube tab
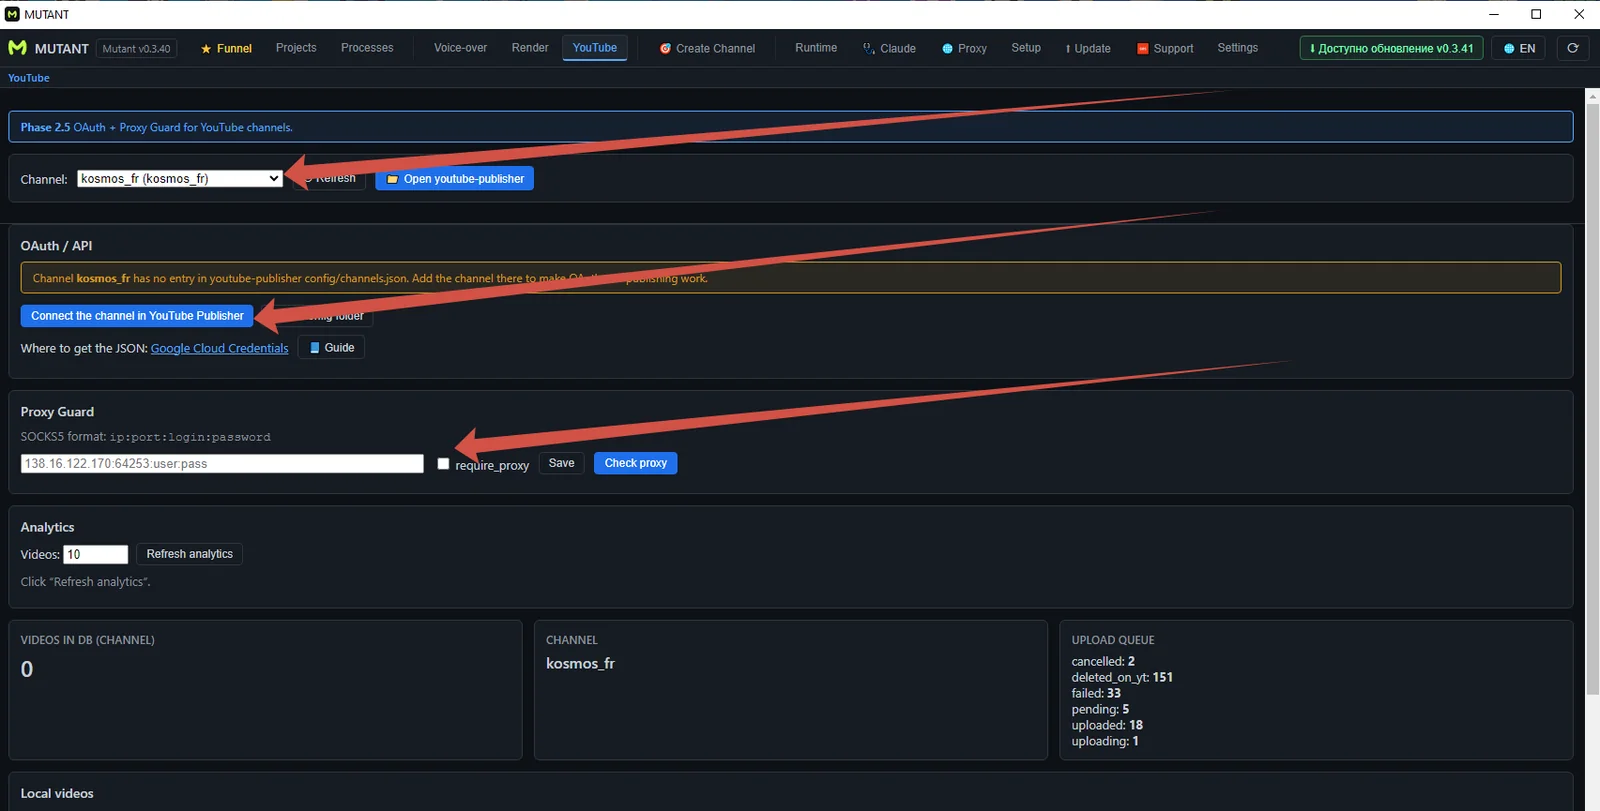
In the app, open the YouTube tab and pick your channel at the top.
If you use a proxy, put it into the Proxy Guard field, tick require_proxy and click Check proxy.
Then click Connect the channel in YouTube Publisher.
Step 2. Link the app to your YouTube channel
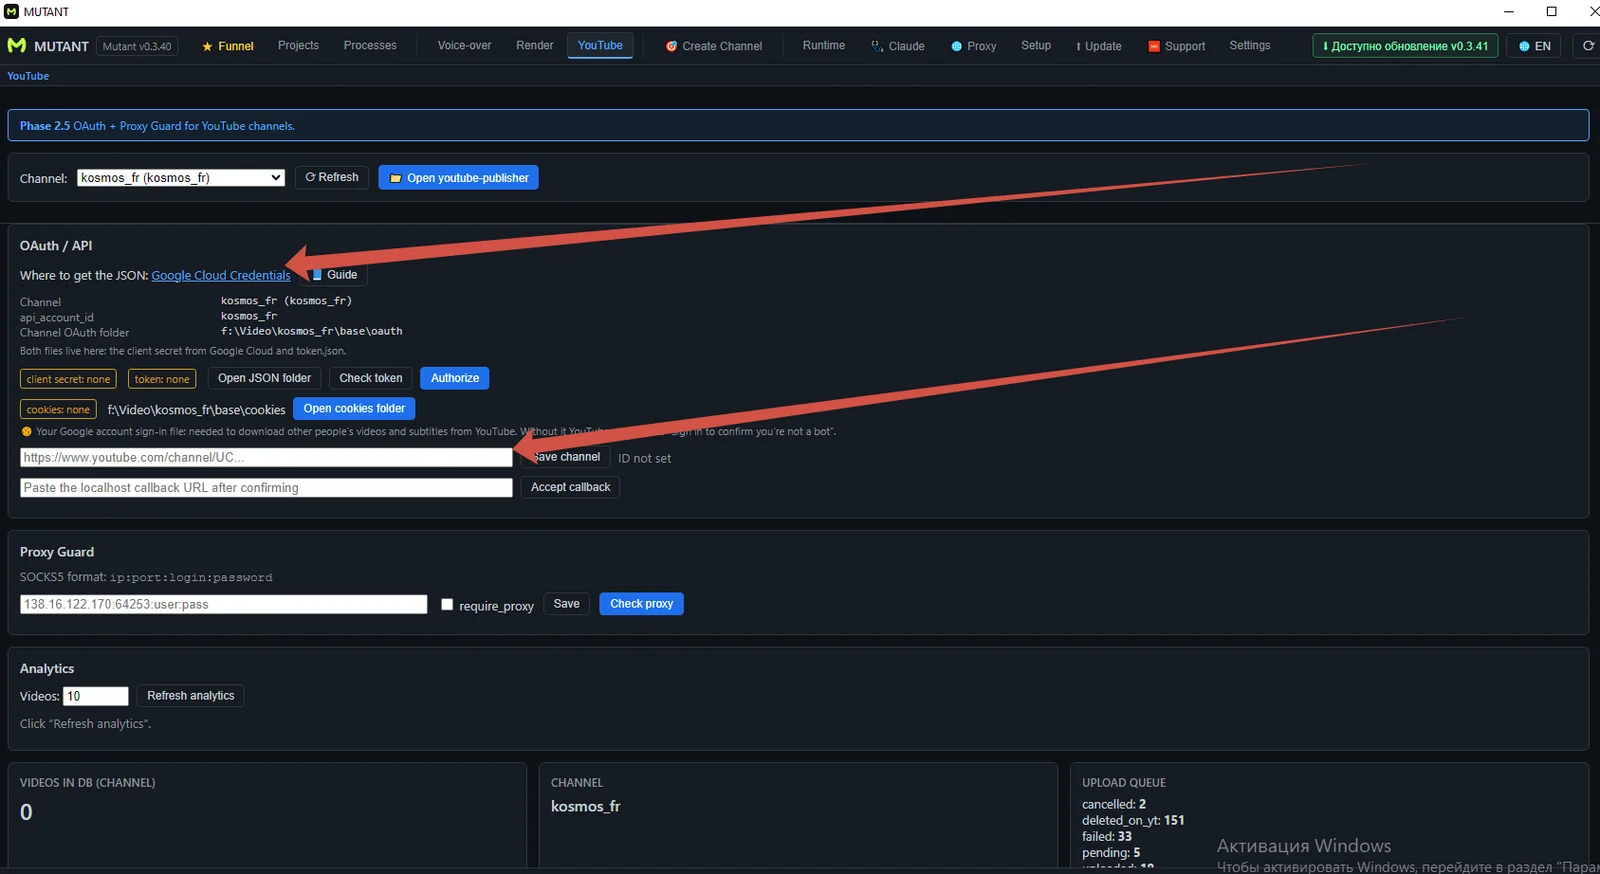
Open YouTube Studio → Channel settings and copy your channel's URL from there.
Click the Google Cloud Credentials link — it copies a link to your clipboard.
Important: paste that link into the browser where you're currently signed in to the right YouTube account — not just any browser.
Step 3. Create a project in Google Cloud
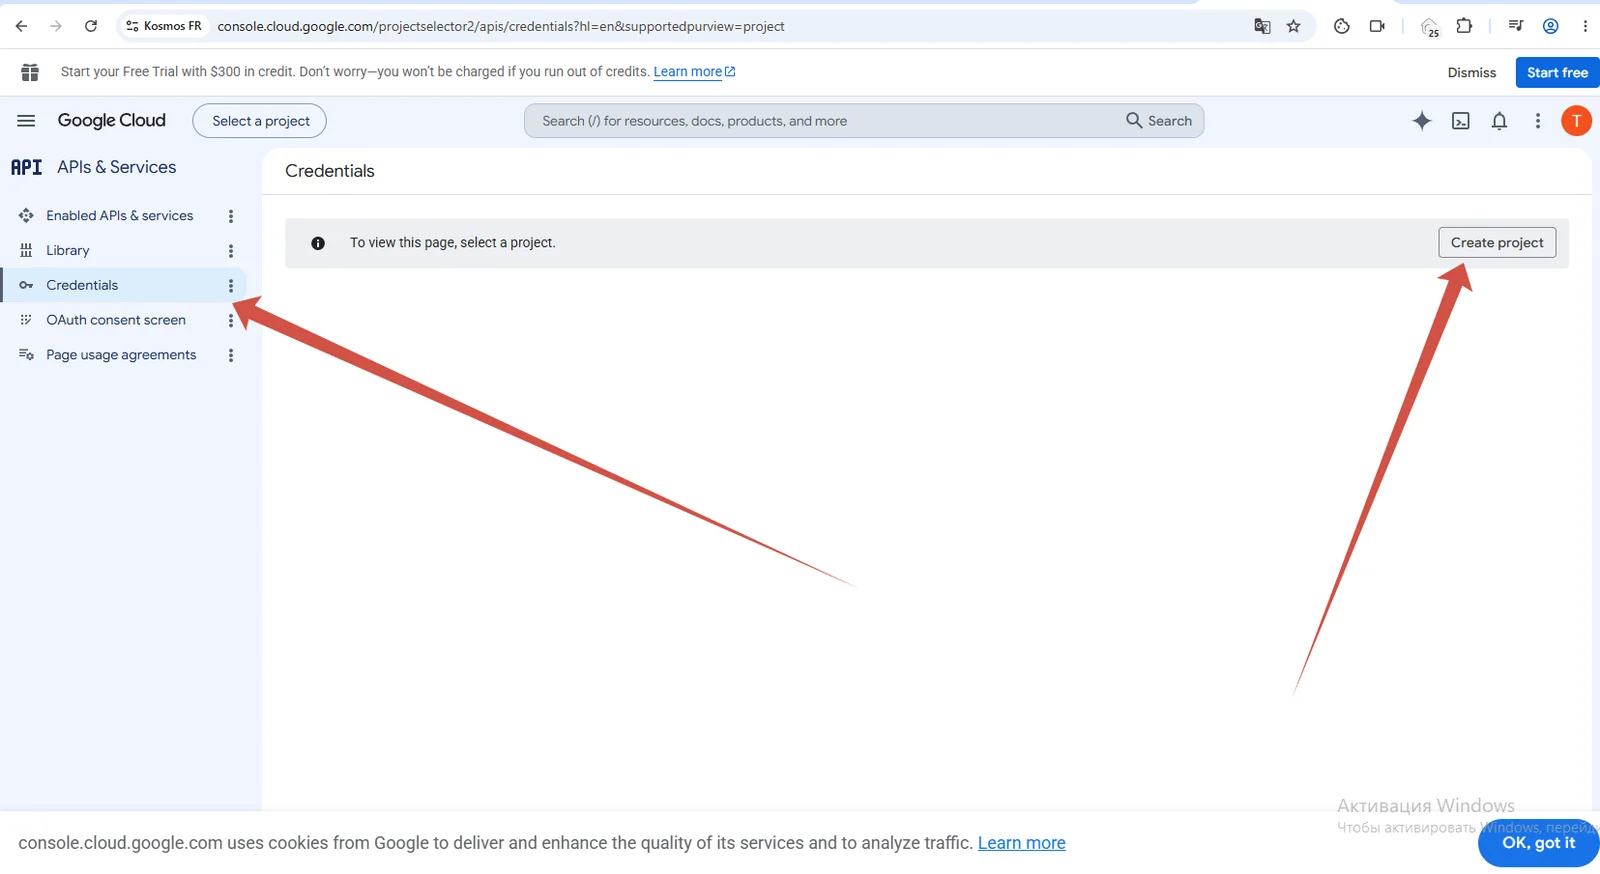
The link opens the Google Cloud page with the Credentials section. Click Create project.
Step 4. Name the project
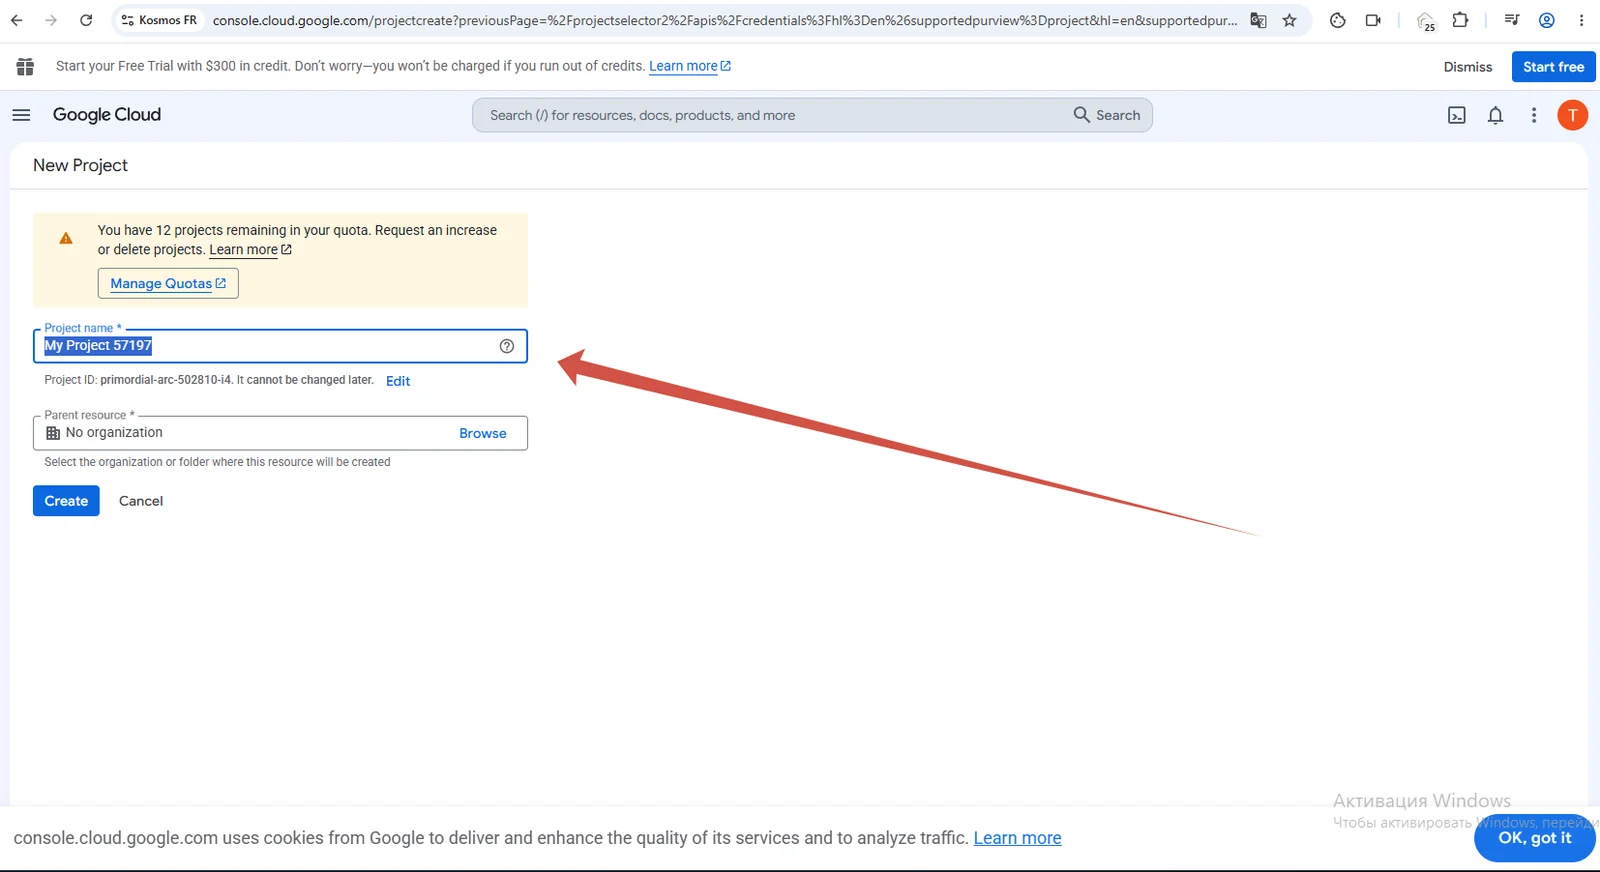
The project name can stay whatever it is — no need to change it. Leave "Parent resource" as is. Click Create.
Step 5. Create credentials
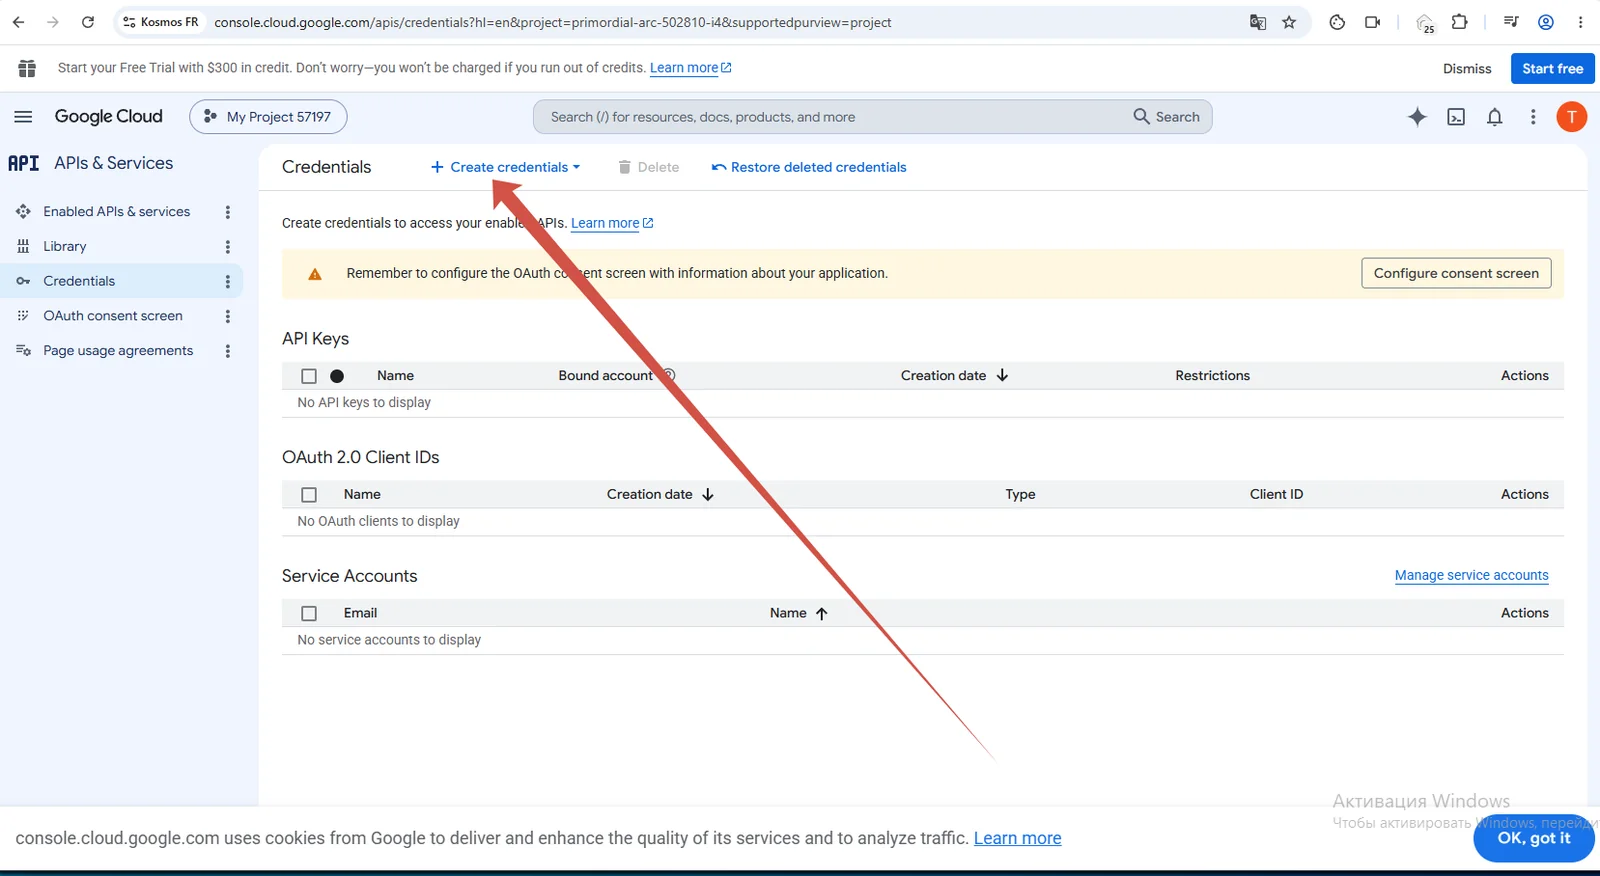
On the Credentials page click + Create credentials.
Step 6. Choose OAuth client ID
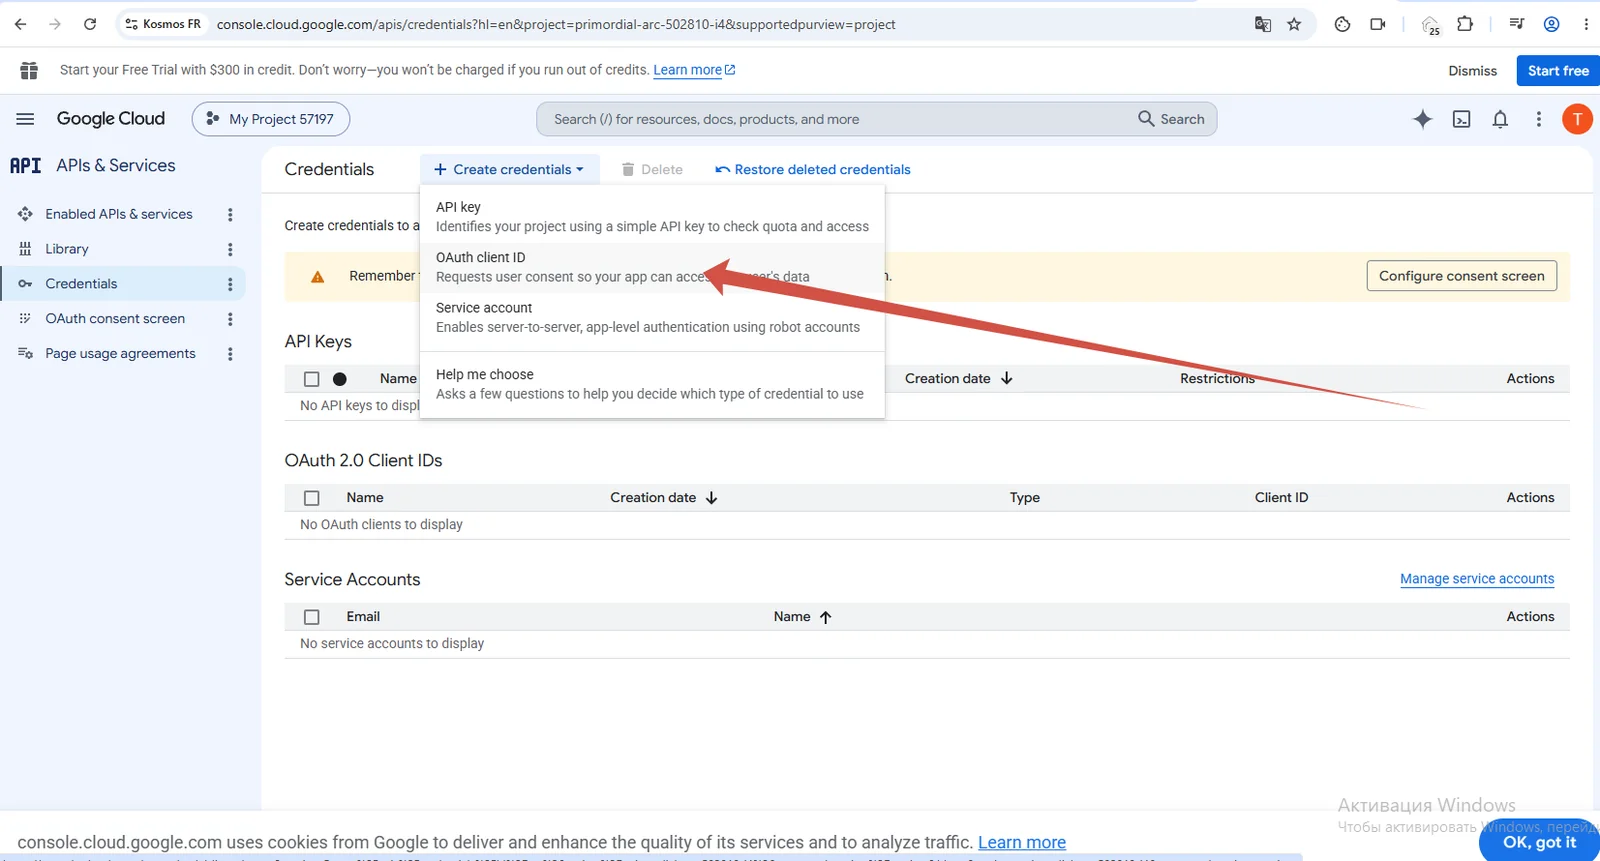
From the dropdown menu choose OAuth client ID.
Step 7. Configure the consent screen
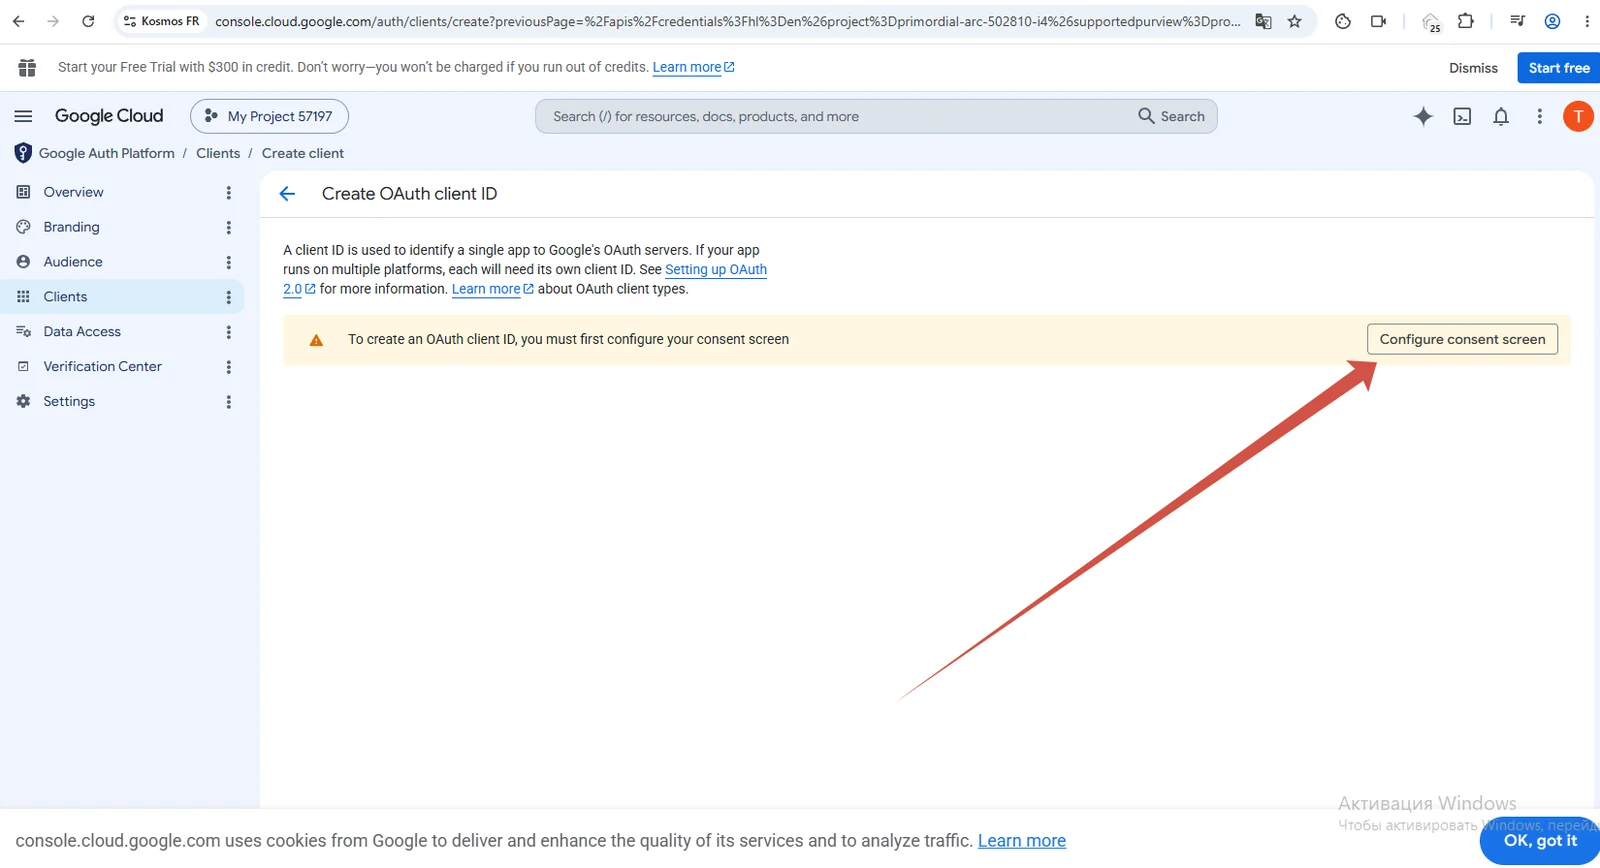
Google will ask you to configure the consent screen first — click Configure consent screen.
Step 8. Get started
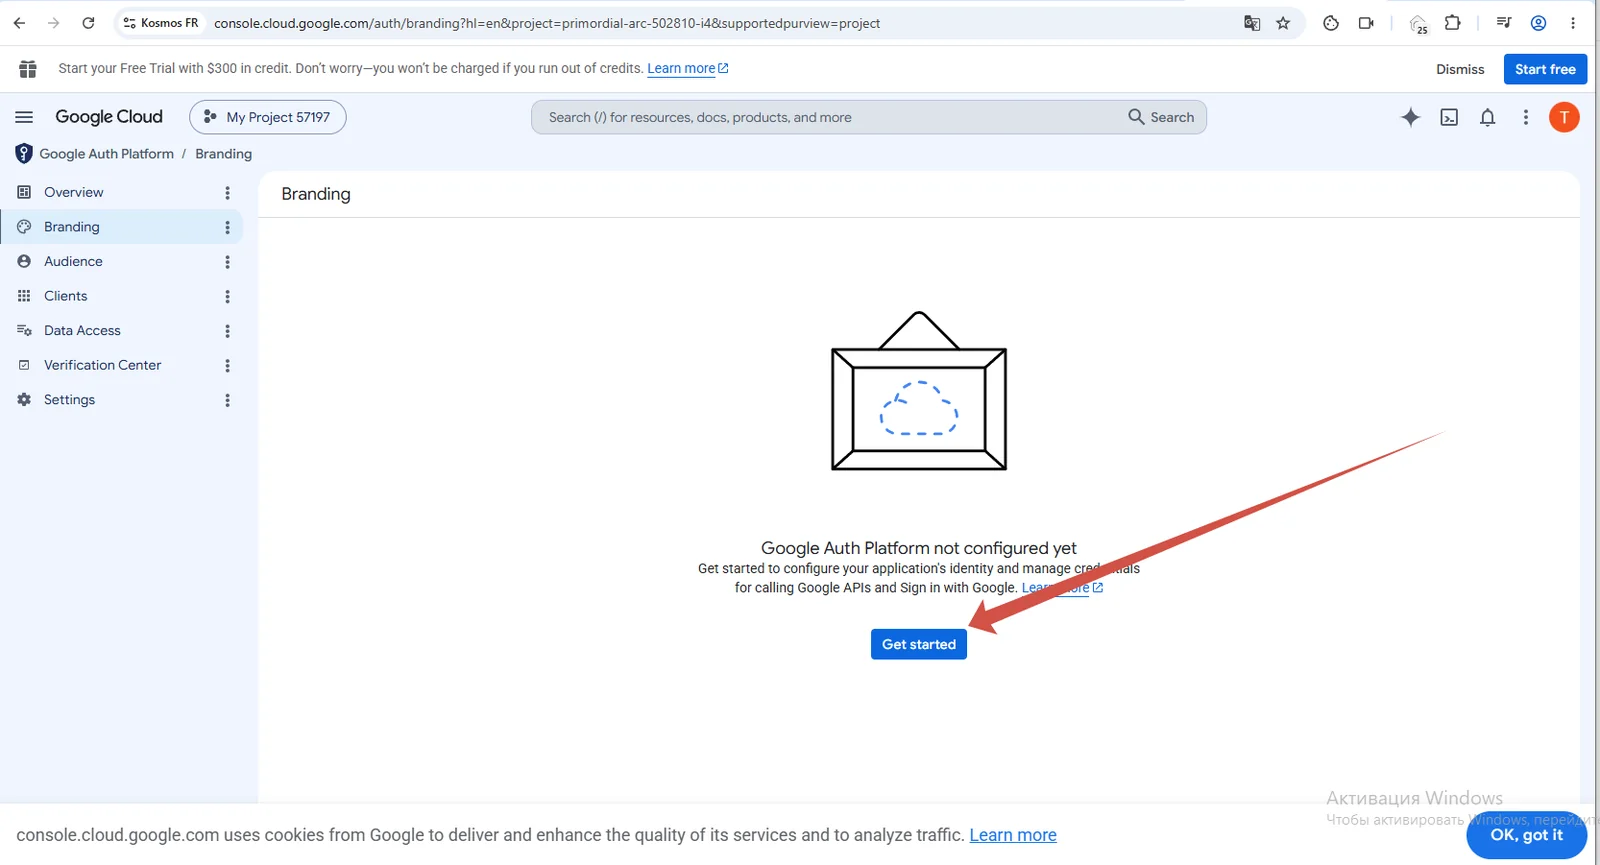
Click Get started.
Step 9. Name the app and pick your email
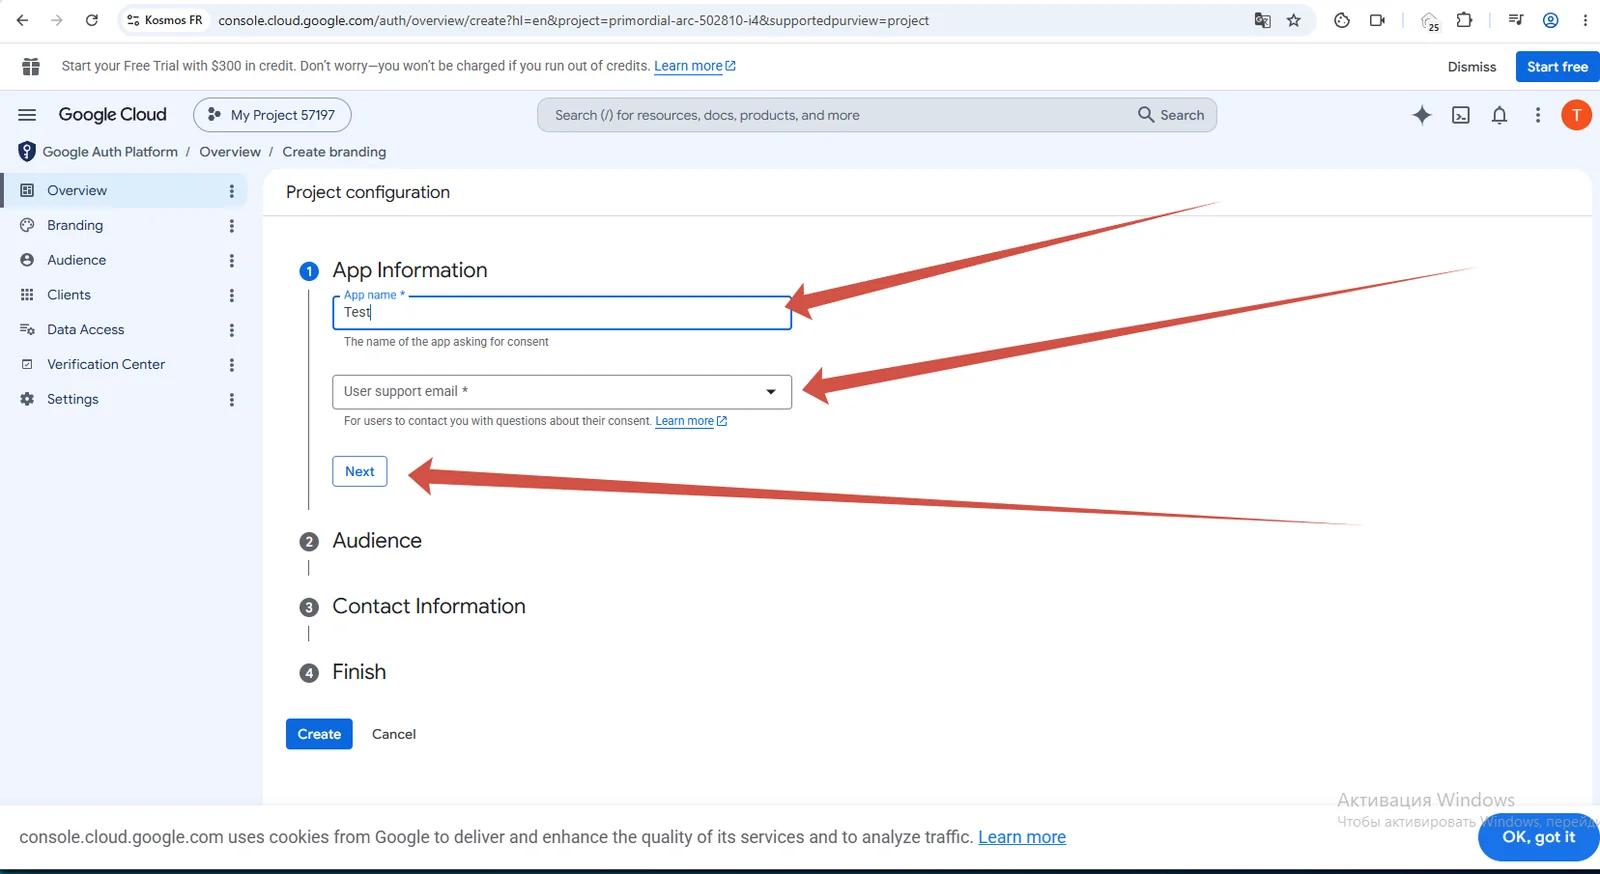
App name — type any name you like. User support email — pick your channel's email from the dropdown (it fills in automatically).
Tip: copy this email to your clipboard — you'll need it again in a moment.
Click Next.
Step 10. Choose the audience type — External
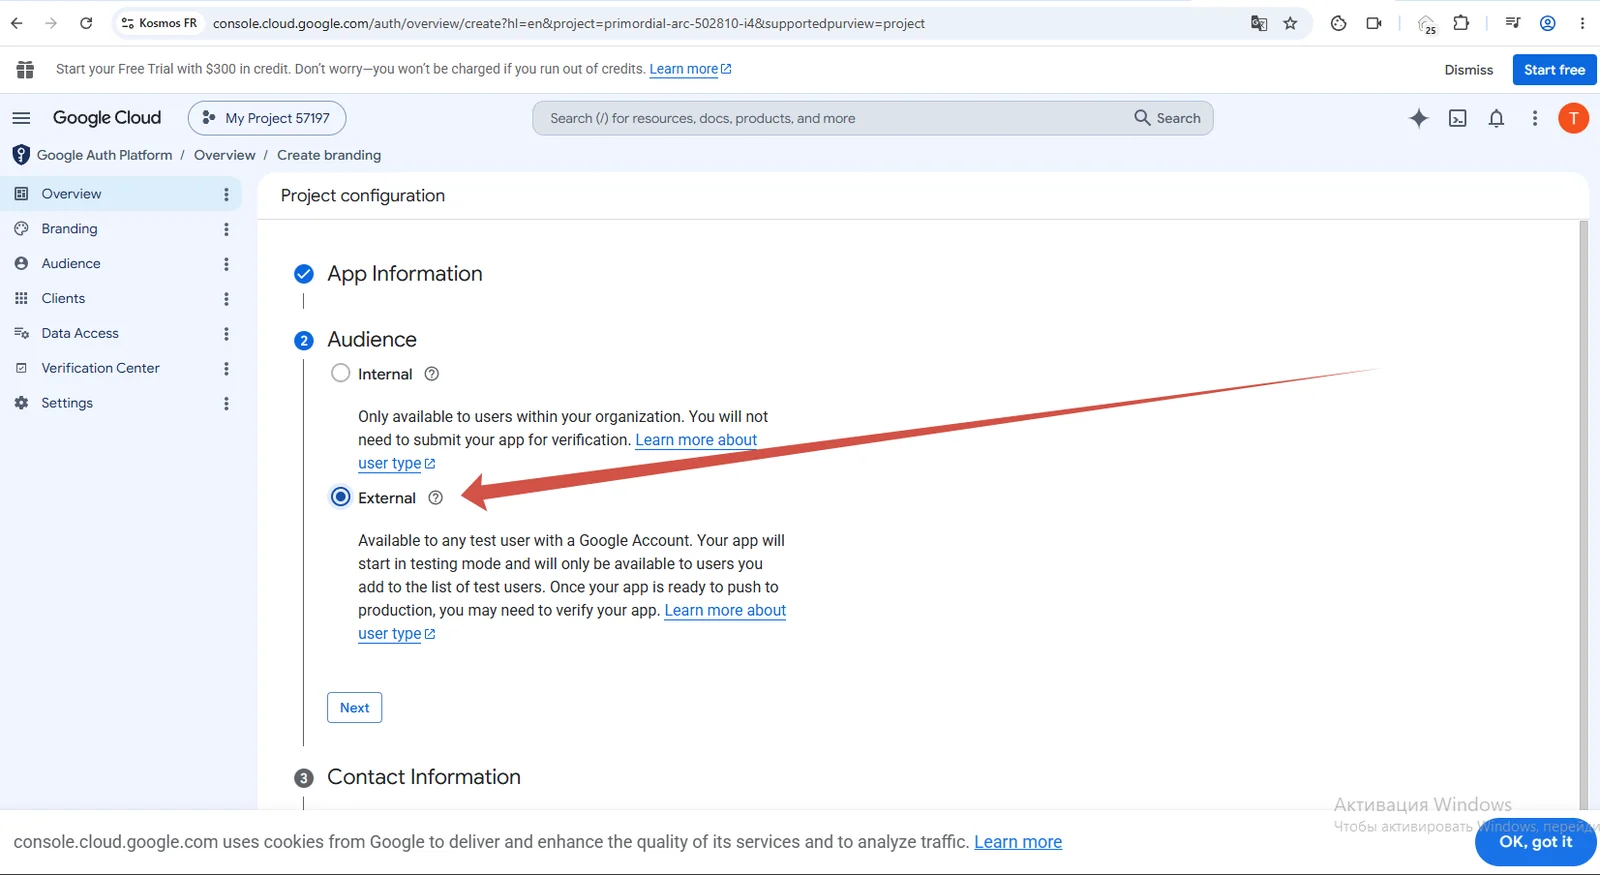
Make sure to pick External (not Internal). Click Next.
Step 11. Add a contact email
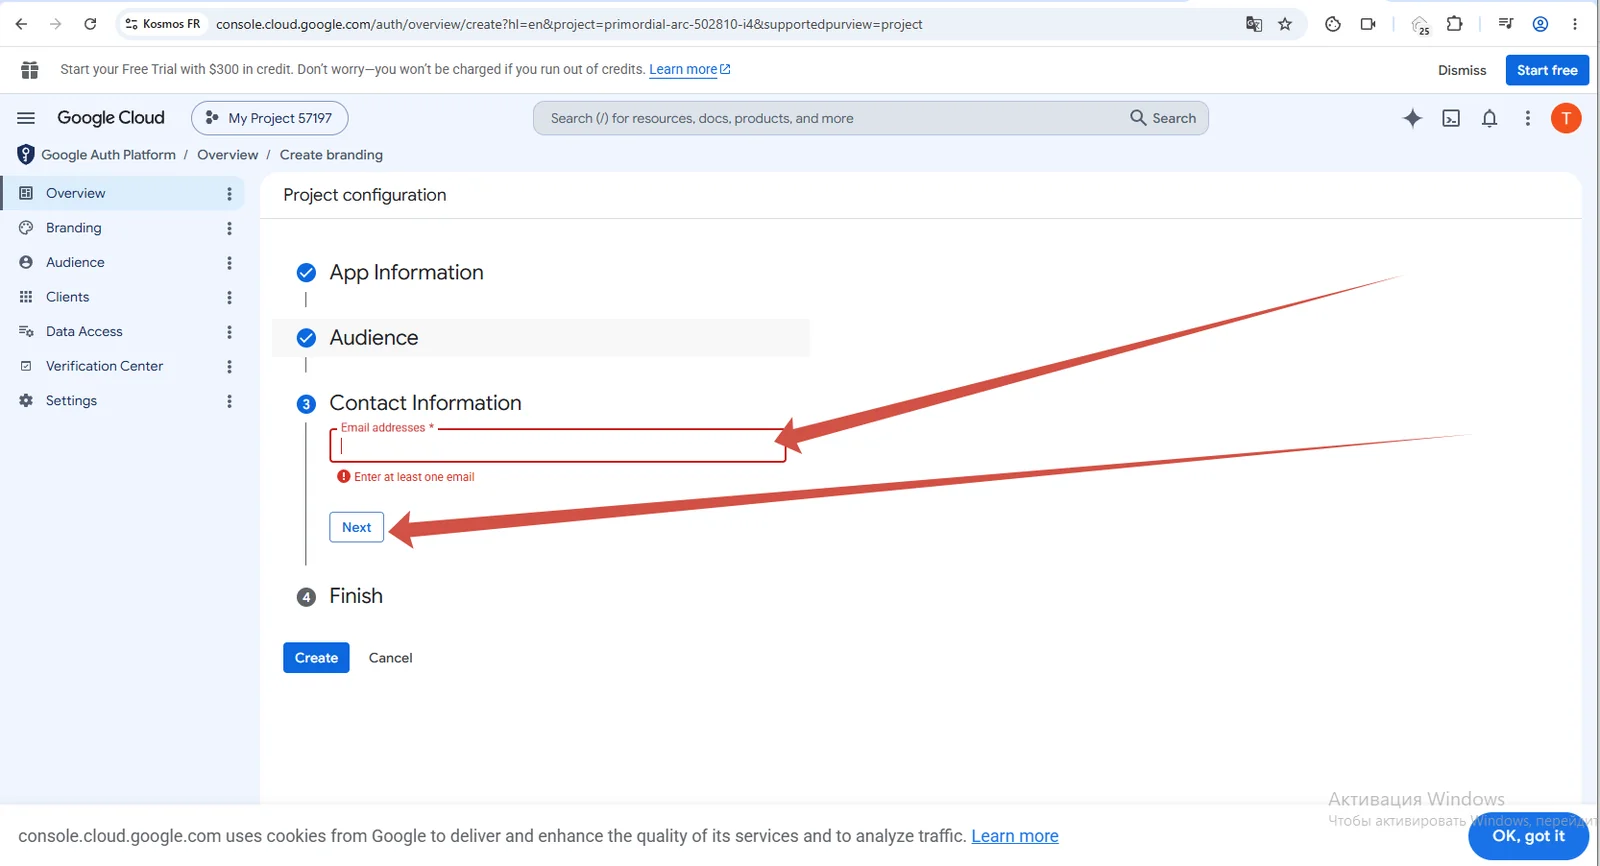
Type in an email — paste the same channel email from your clipboard (or use any address). Click Next.
Step 12. Agree to the policy
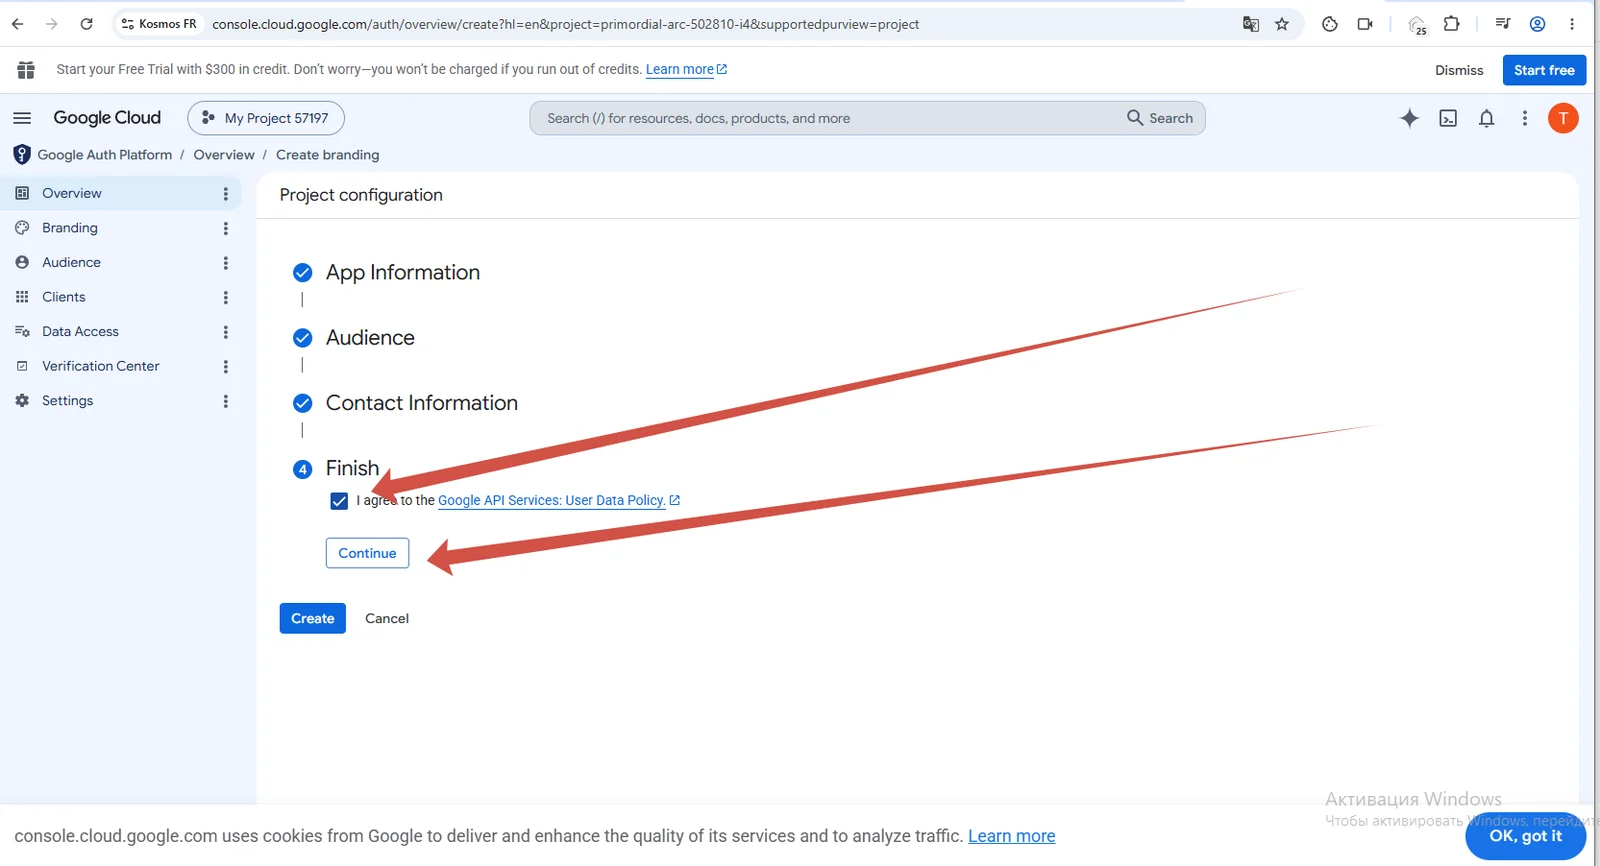
Tick I agree to the Google API Services: User Data Policy and click Continue.
Step 13. Create the configuration
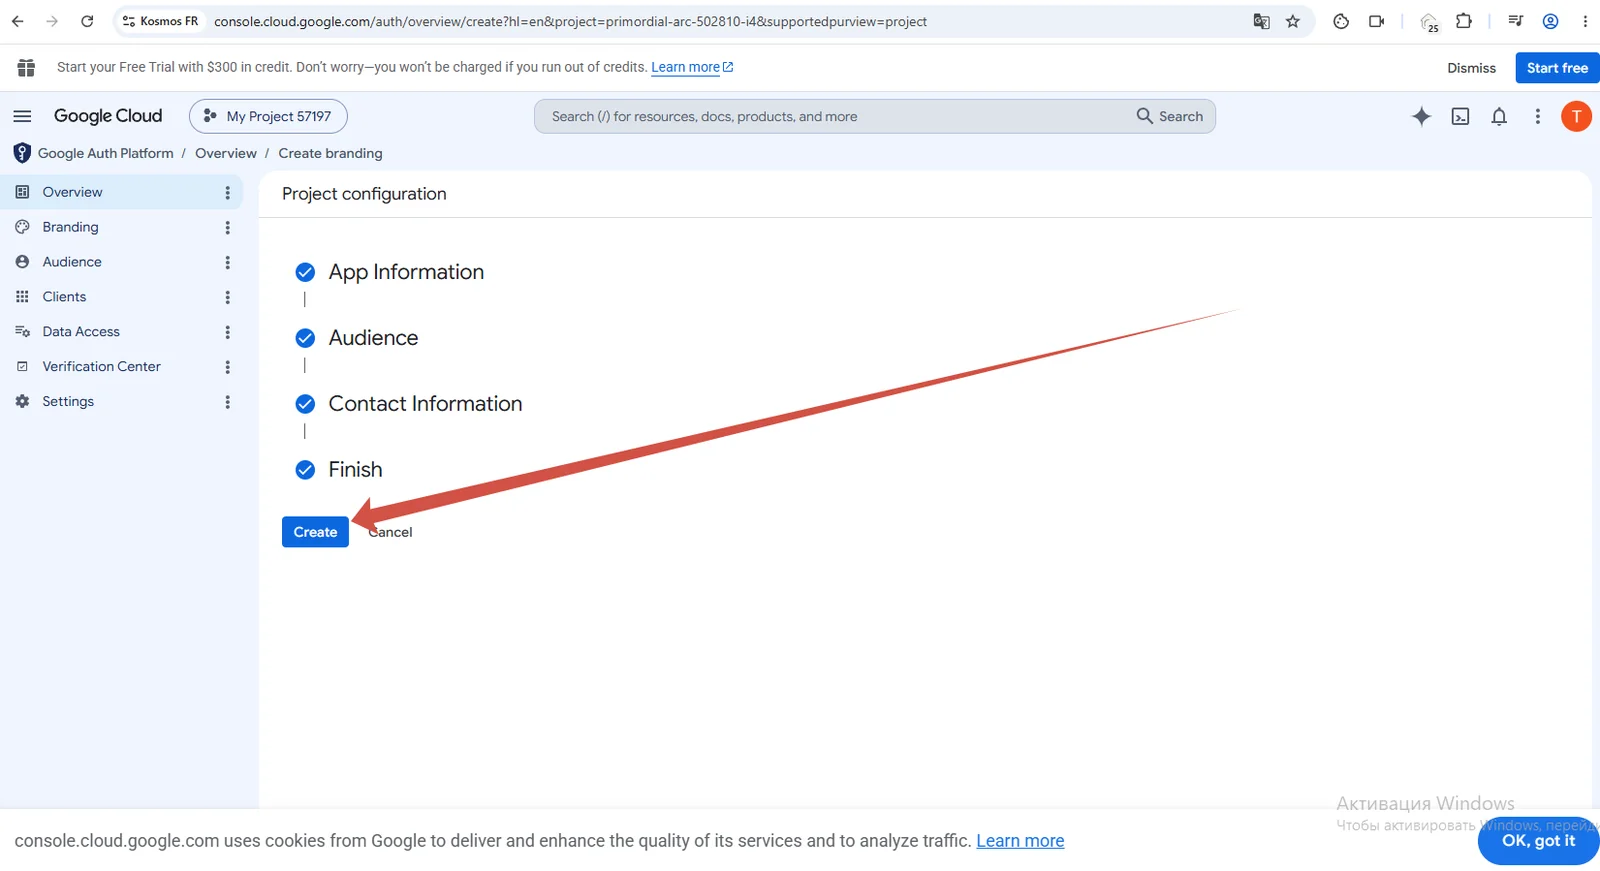
All four steps are checked — click Create.
Step 14. Create the OAuth client
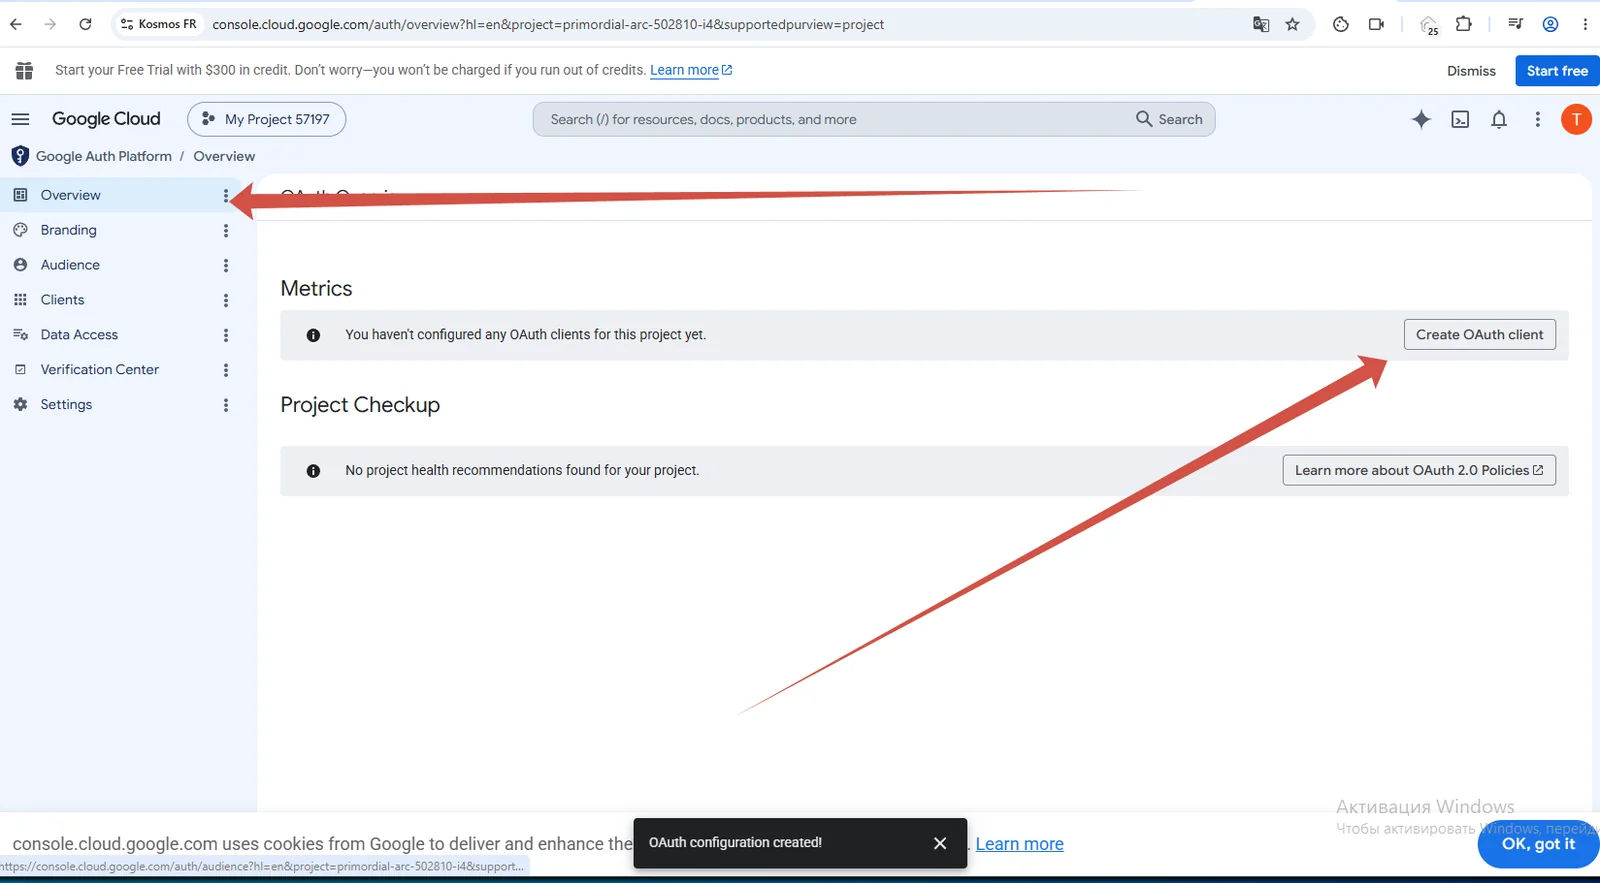
You'll see "OAuth configuration created!". In the Metrics block click Create OAuth client.
Step 15. Choose Desktop app
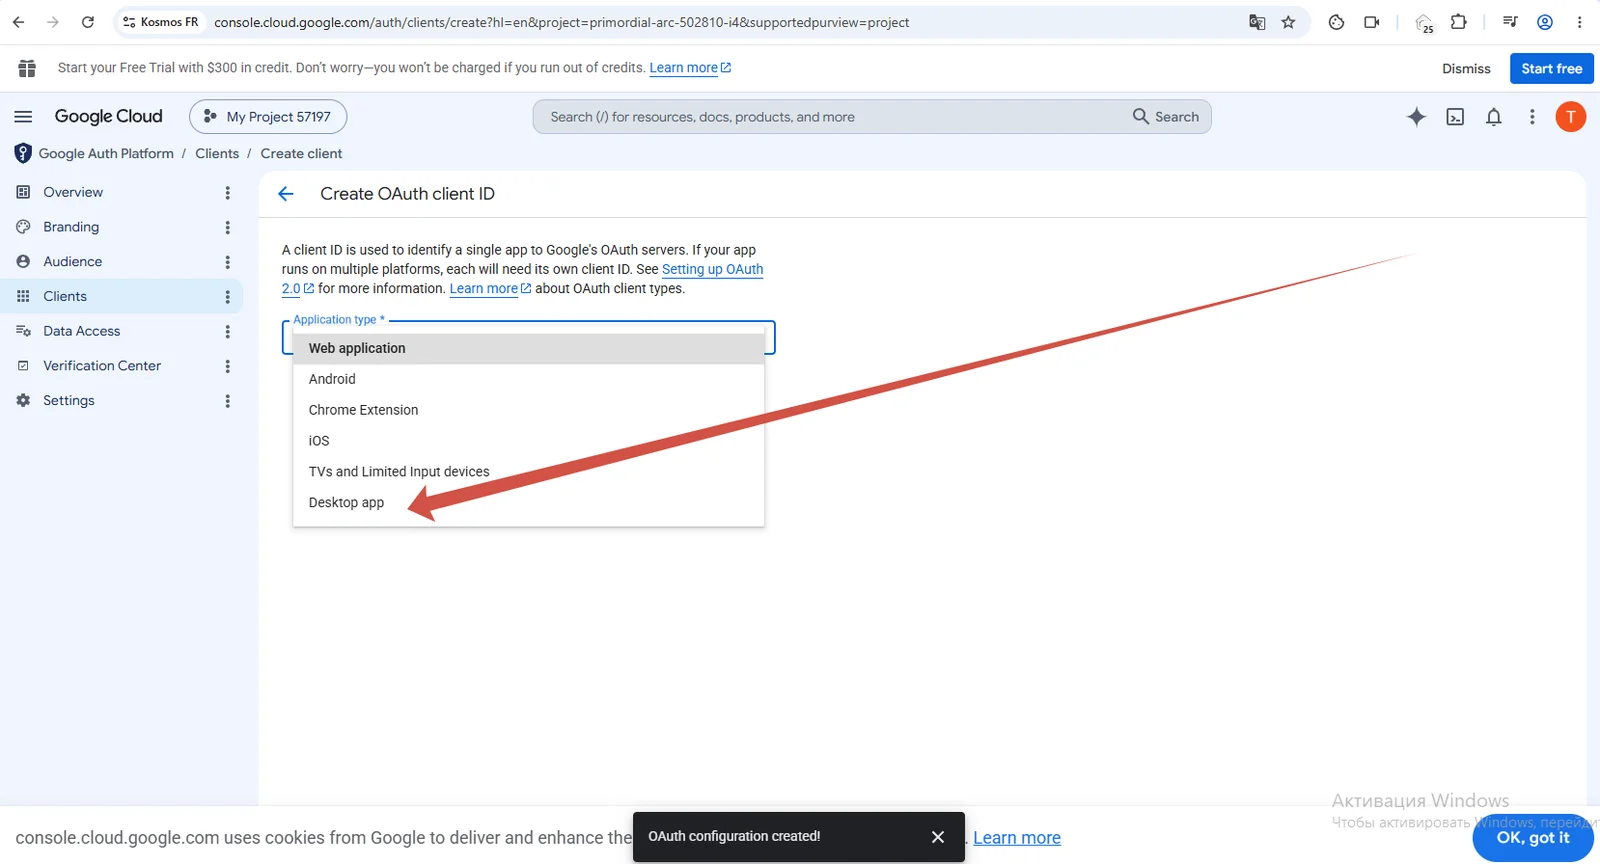
From the application-type list choose Desktop app.
Step 16. Name it and create
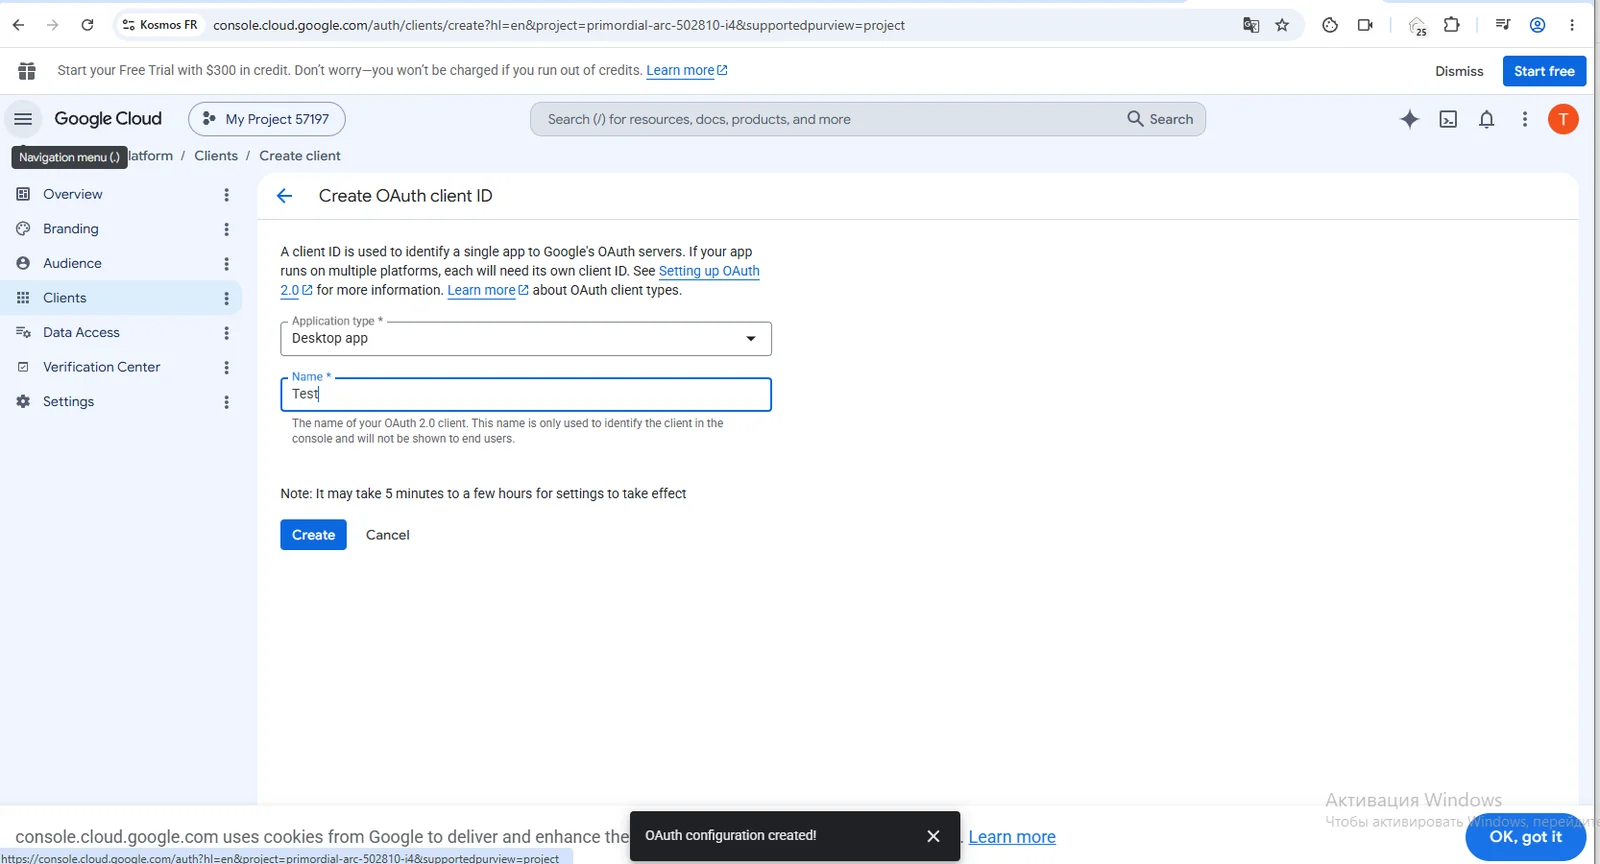
The name can stay whatever it is. Click Create.
Step 17. Download the key file
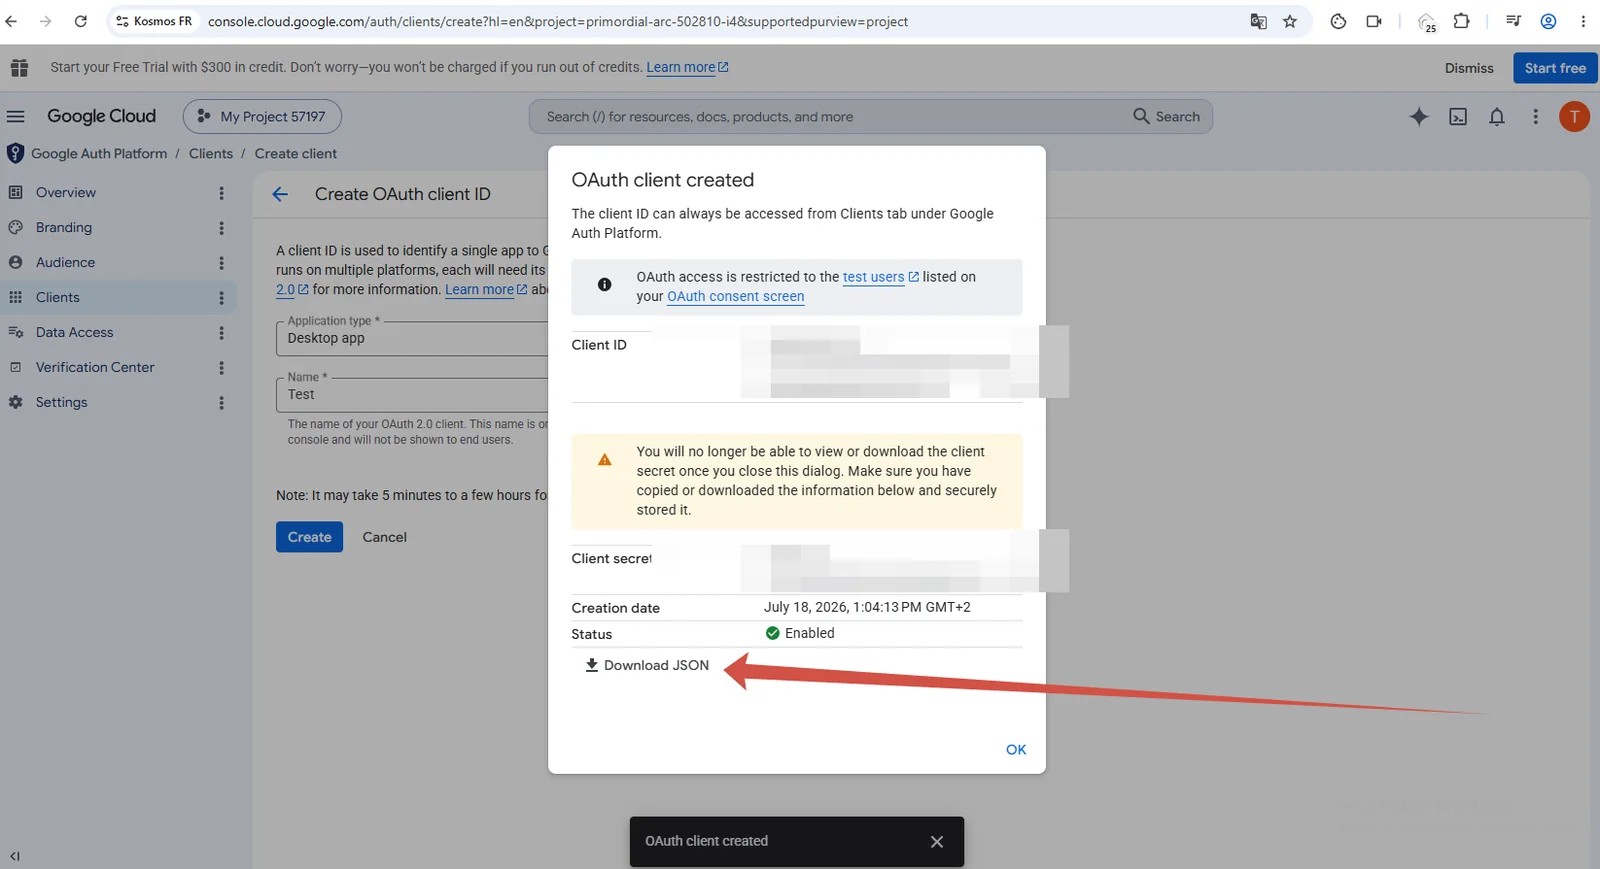
A window with your Client ID and Client secret appears — this is your secret key, never share it with anyone.
Click Download JSON — the file downloads. Move it (don't leave it in "Downloads") into the oauth folder inside your channel's folder.
Important: work on one channel at a time — download the file, move it right away. Files for different channels look alike and are easy to mix up.
Step 18. Publish the app
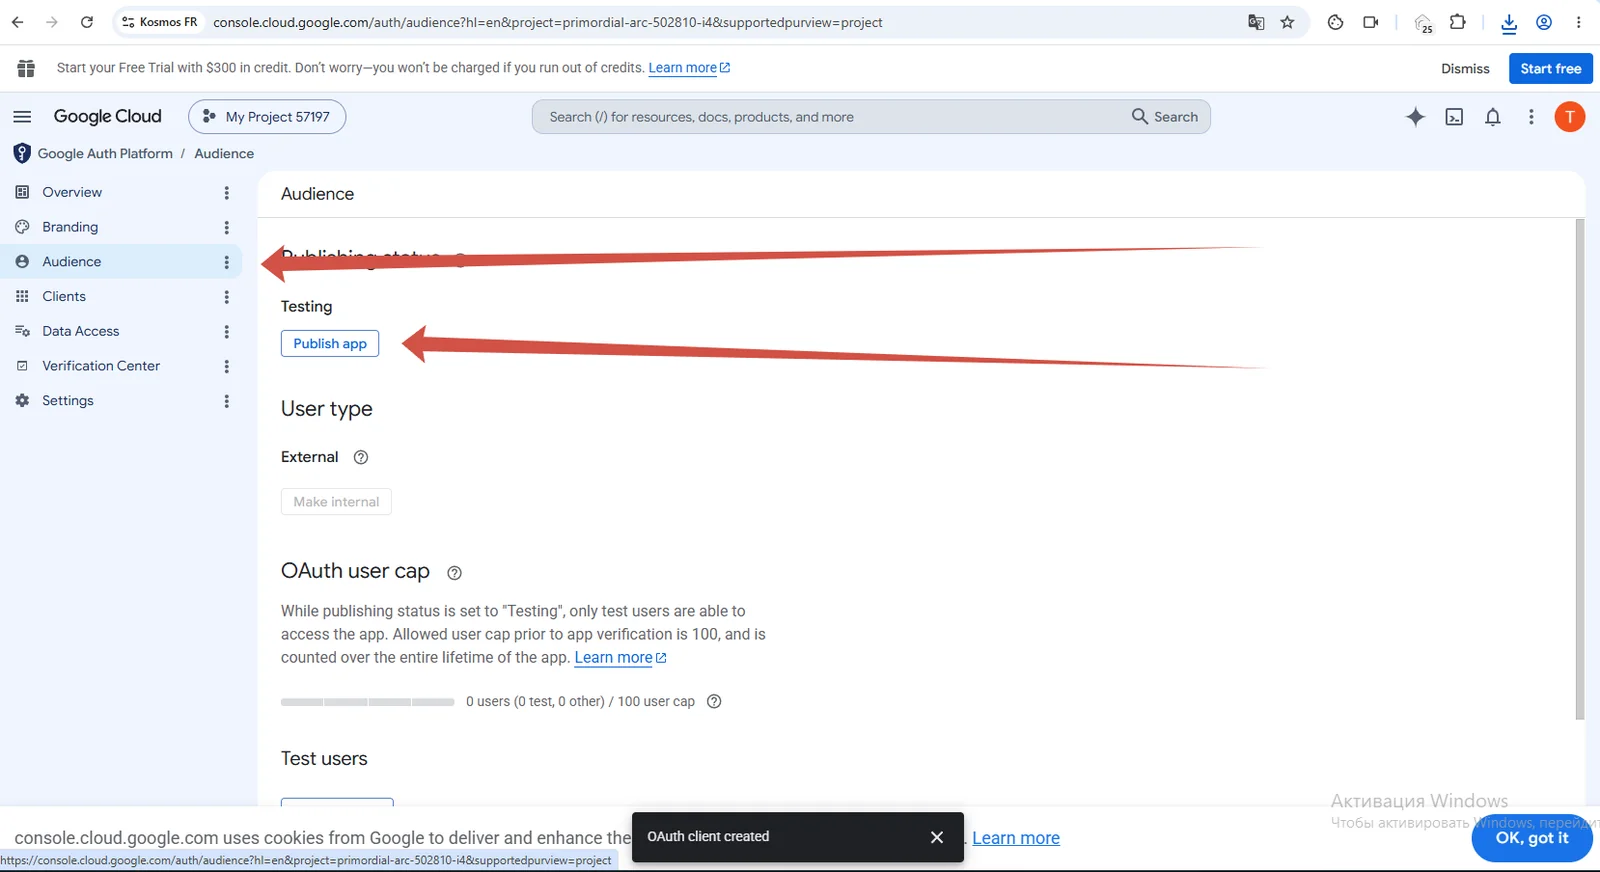
Go to the Audience tab and click Publish app.
Step 19. Enable the required APIs
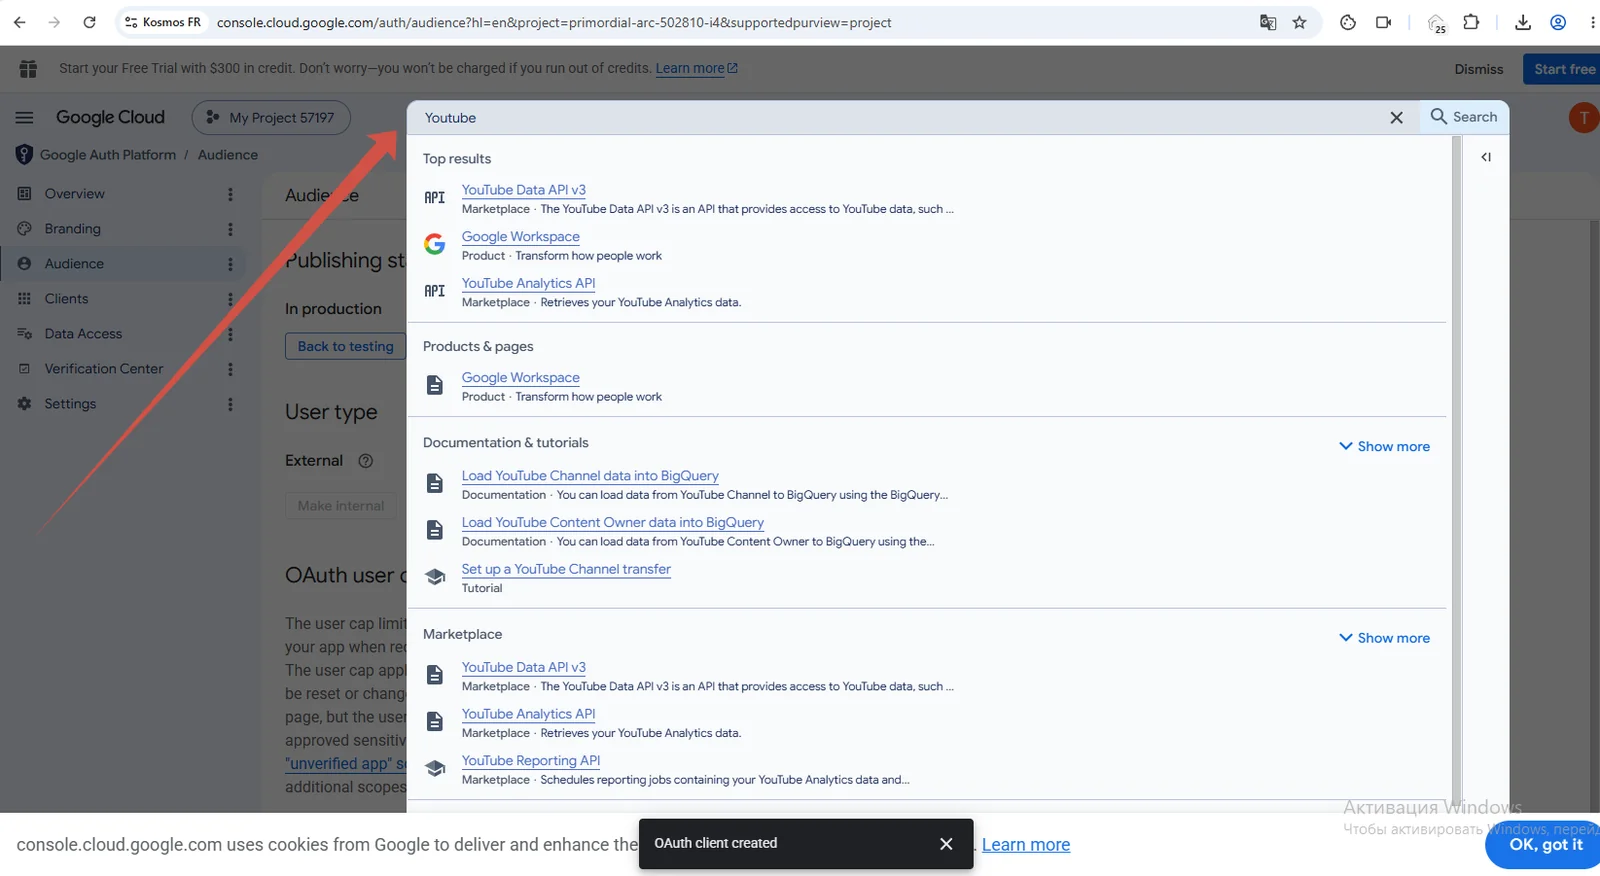
In the search bar at the top type Youtube. In the results find YouTube Data API v3 and YouTube Analytics API — open both in new tabs so you can enable them one by one.
Step 20. Click Enable for each API
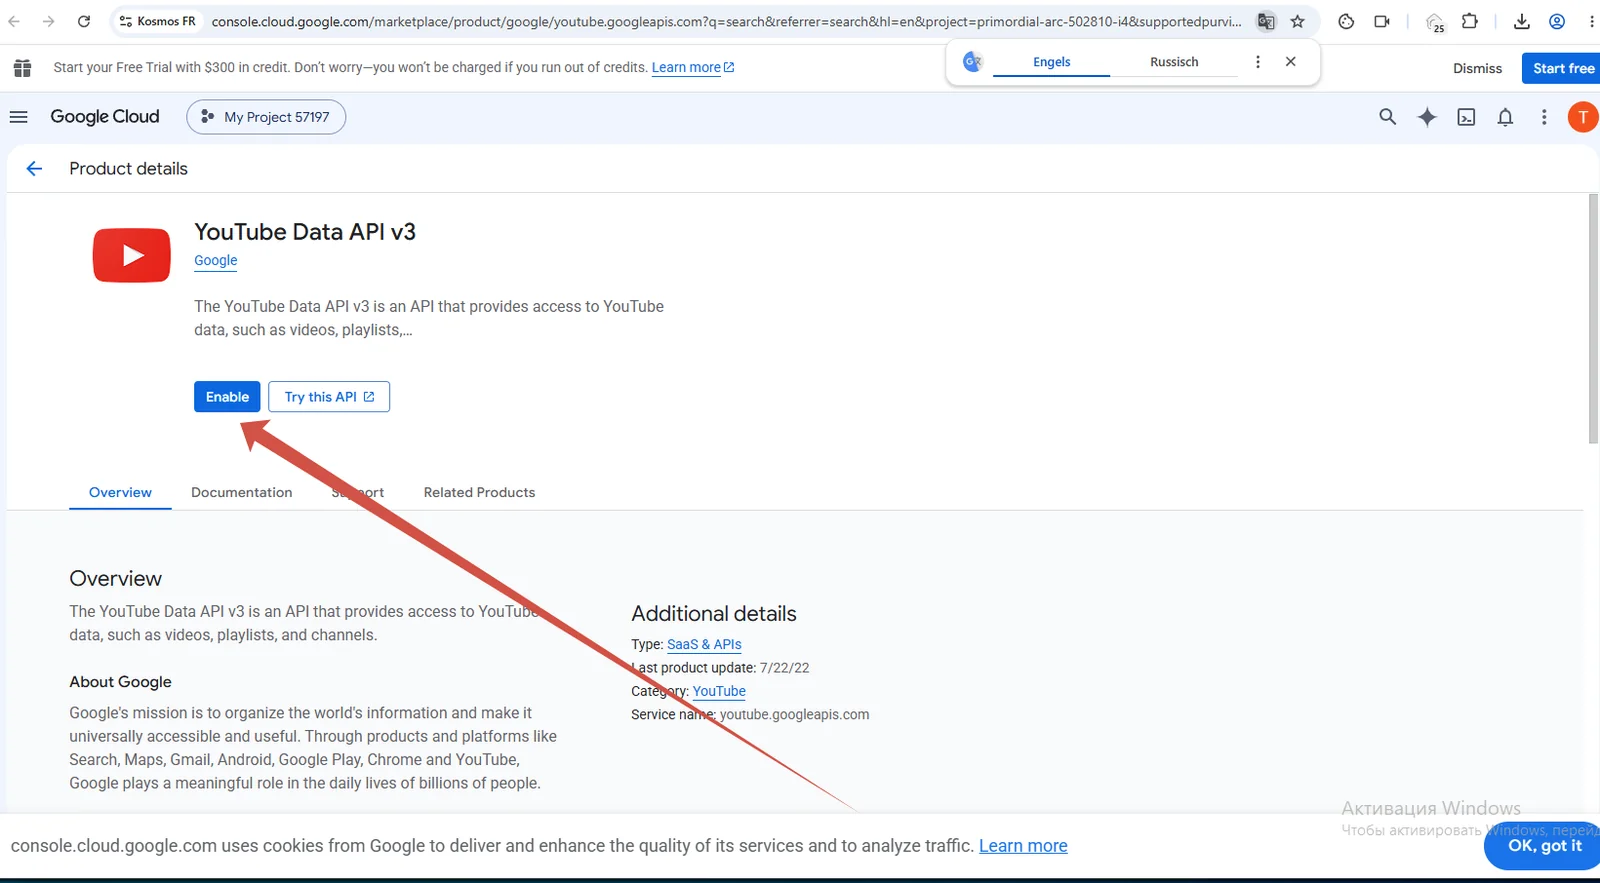
On each API's page click Enable. Do this for both — the Data API and the Analytics API.
Step 21. Save the channel in the app
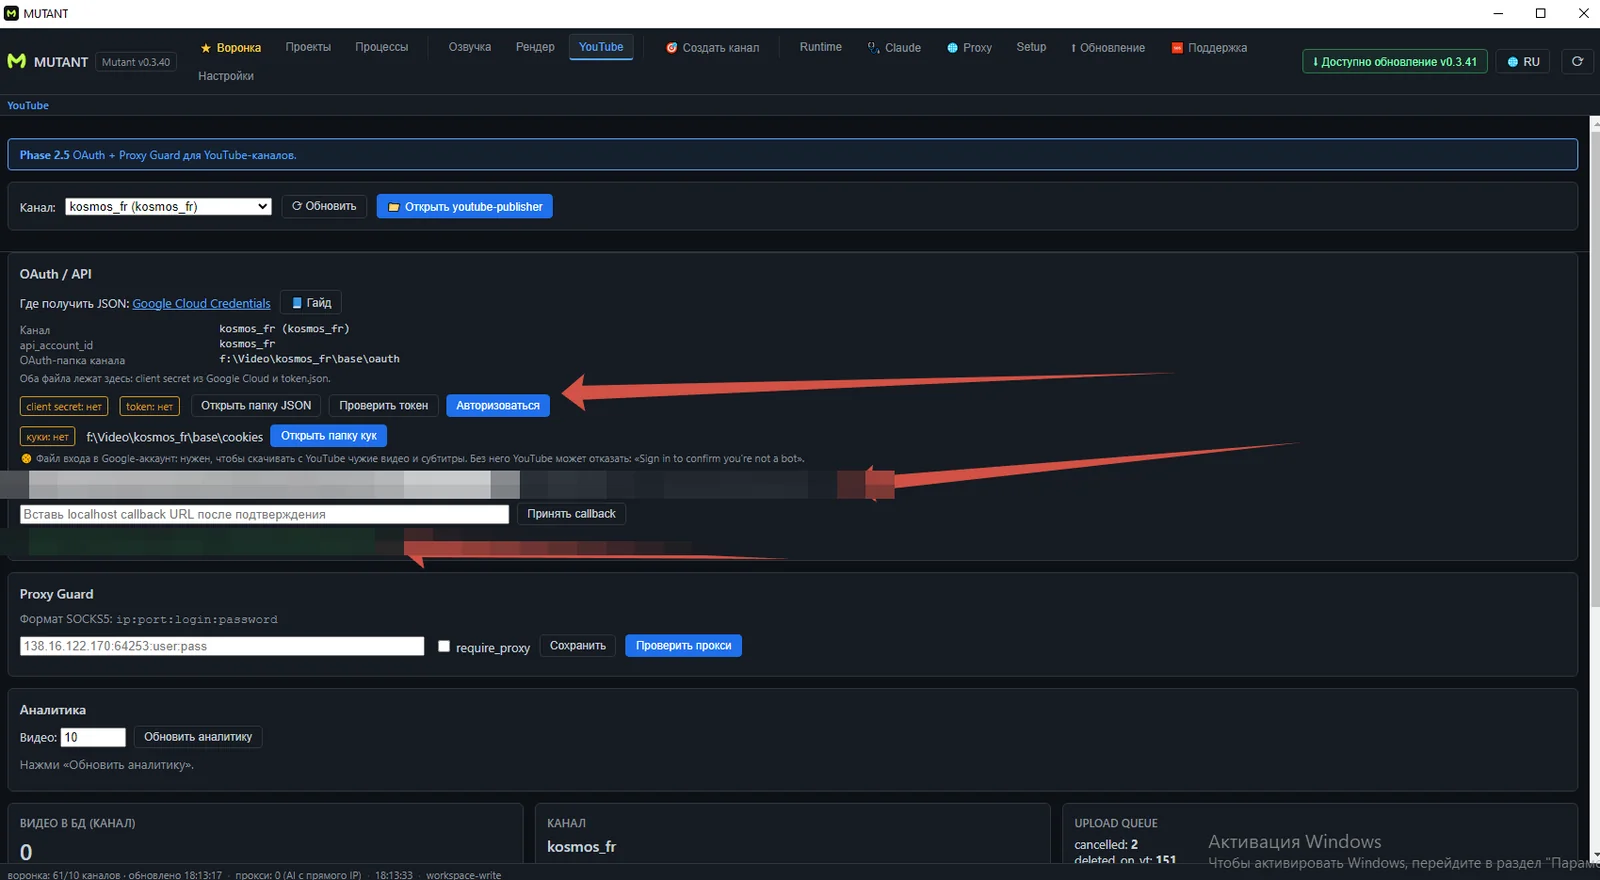
Go back to Mutant. client secret: OK should already be green. If you use a proxy, check that the one connected is the one tied to this specific channel.
Make sure the channel link at the bottom is confirmed in green — the app has found the channel.
Step 22. Click Authorize
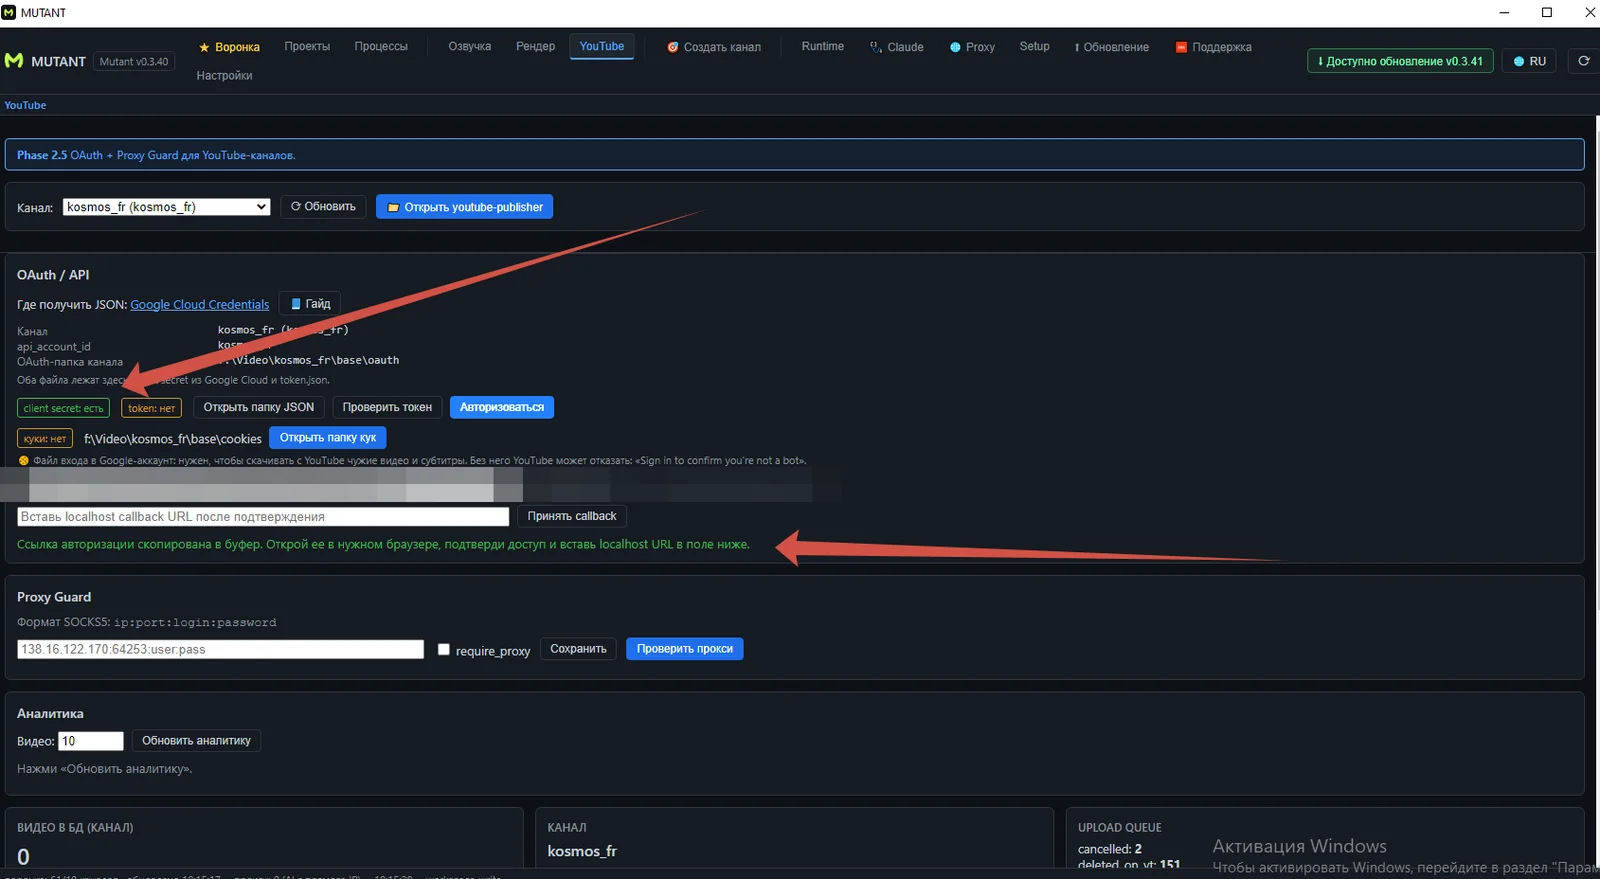
Click Authorize. The app copies an authorization link to your clipboard and shows a hint to open it in the same browser where the channel is signed in.
Step 23. Sign in to your Google account
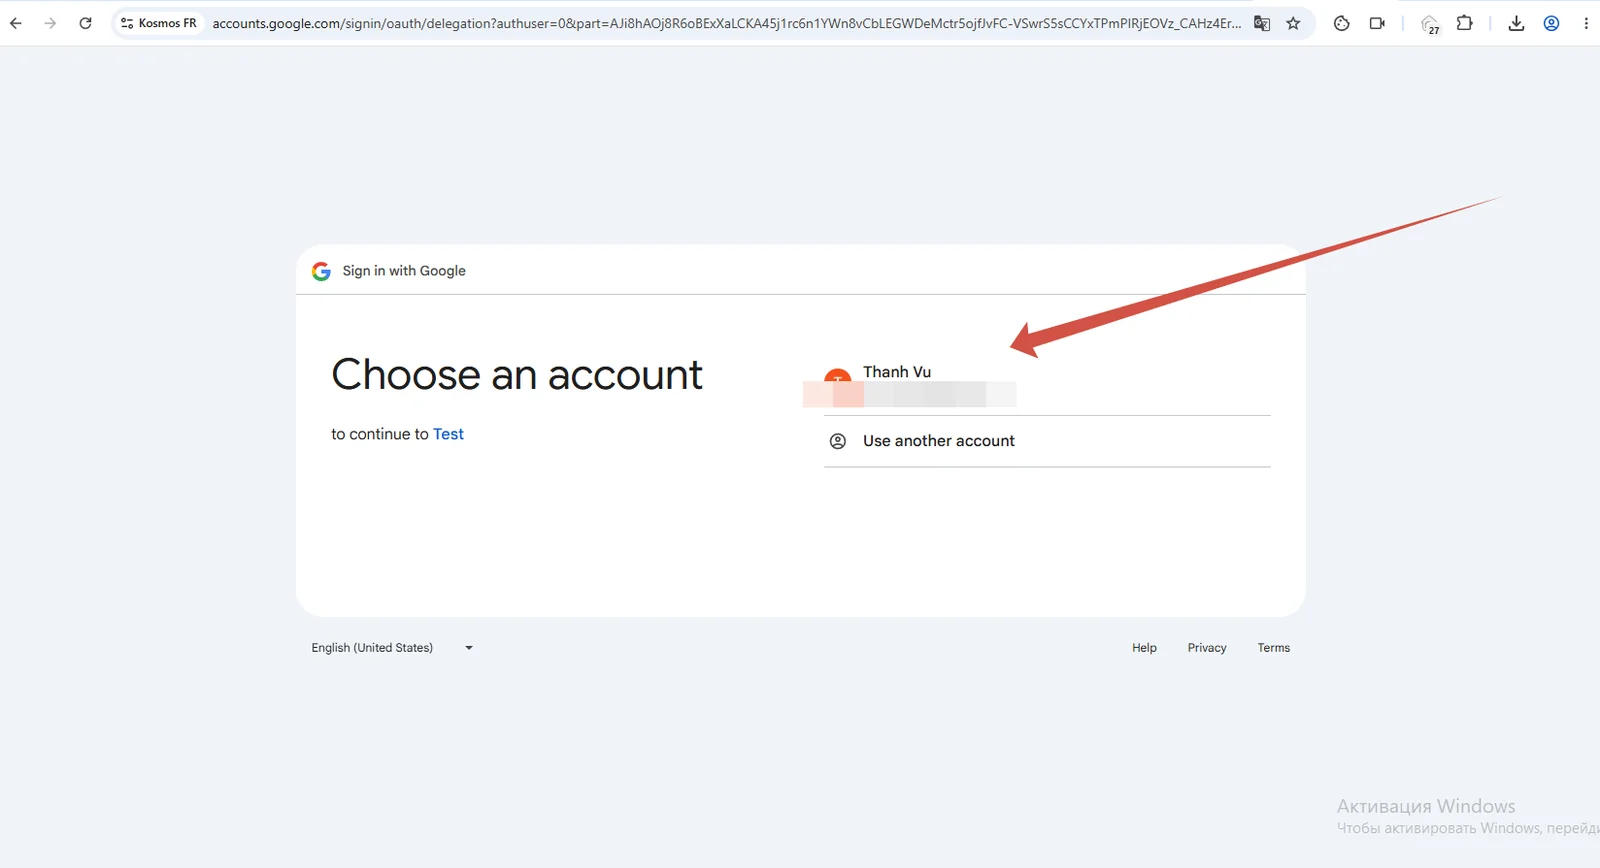
Paste the copied link into the channel's browser. Google will ask which account to sign in with — pick the right one. You may need your password and a two-factor code.
Step 24. “Google hasn't verified this app” — that's expected
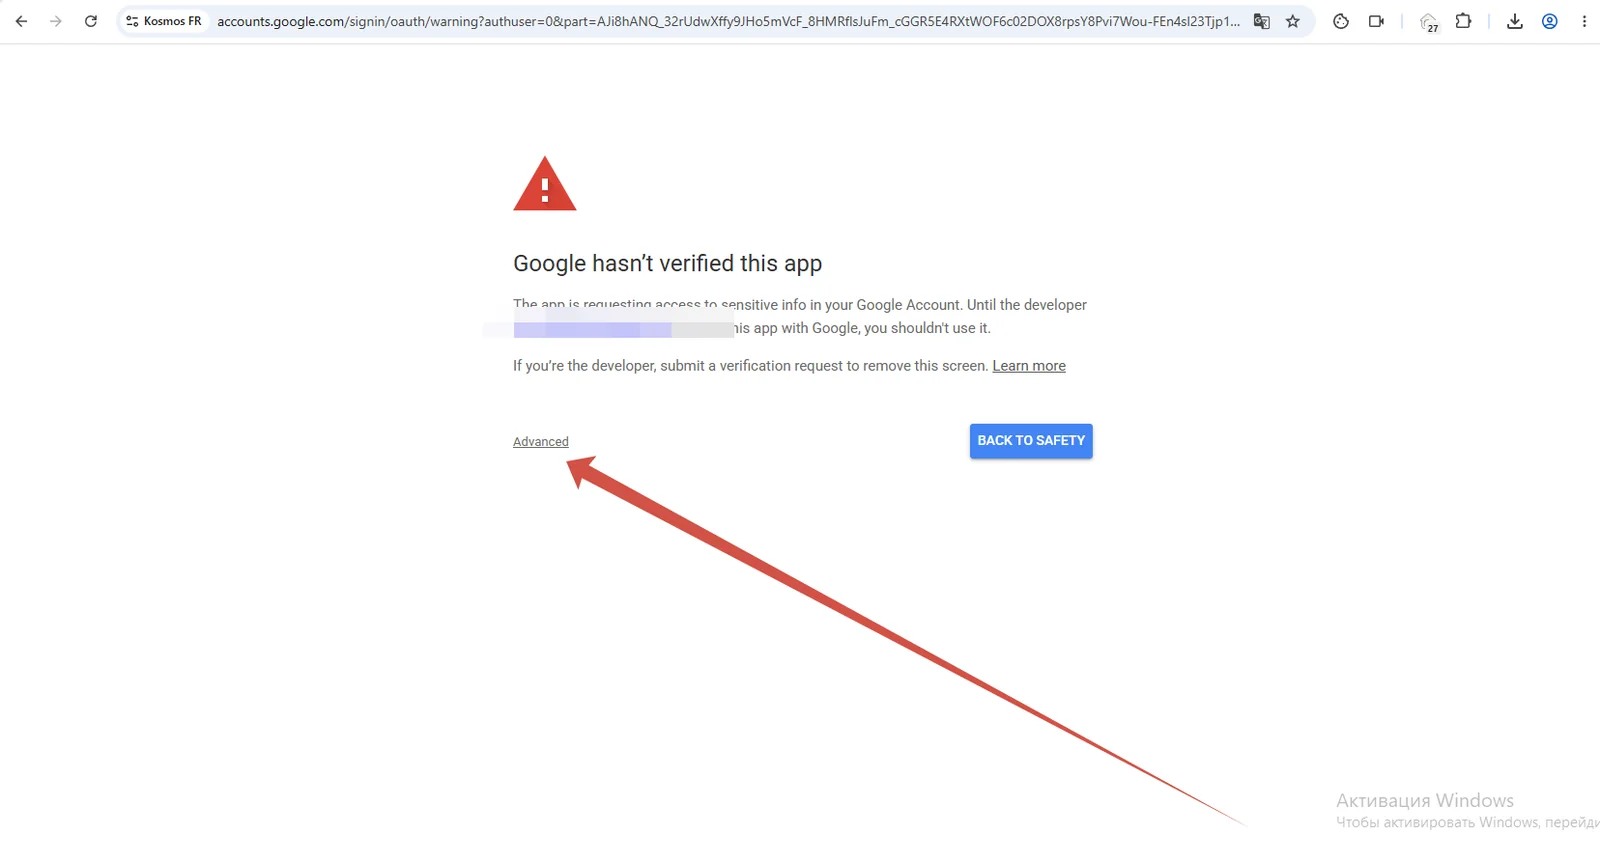
Google will warn that the app isn't verified — that's expected, since this is a third-party app. Click Advanced.
Step 25. Go to the app
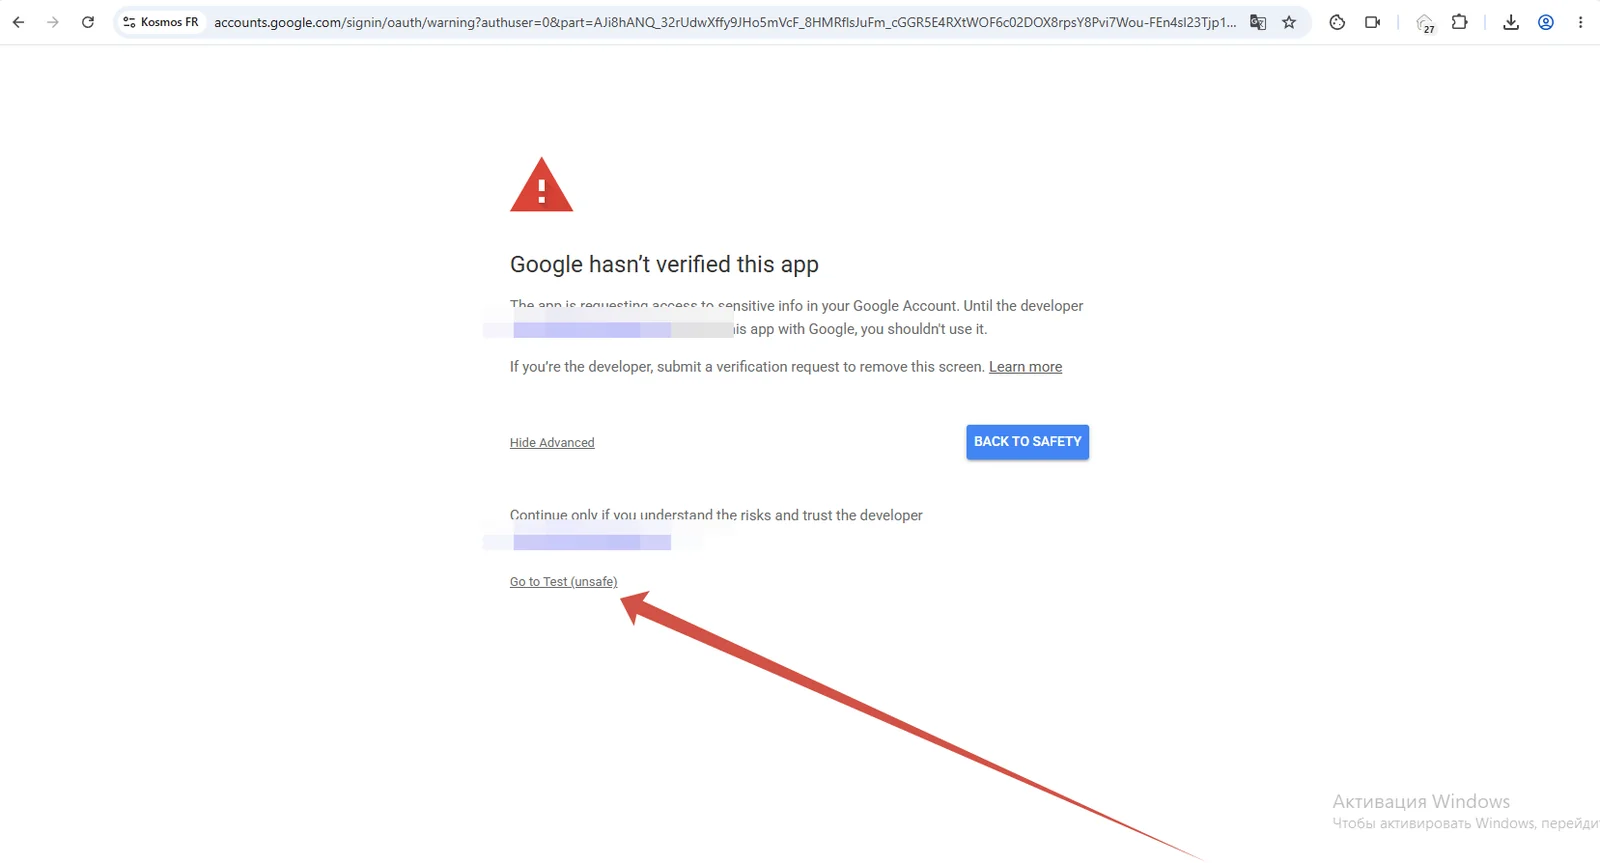
A link Go to [app name] (unsafe) appears at the bottom — click it.
Step 26. Grant access
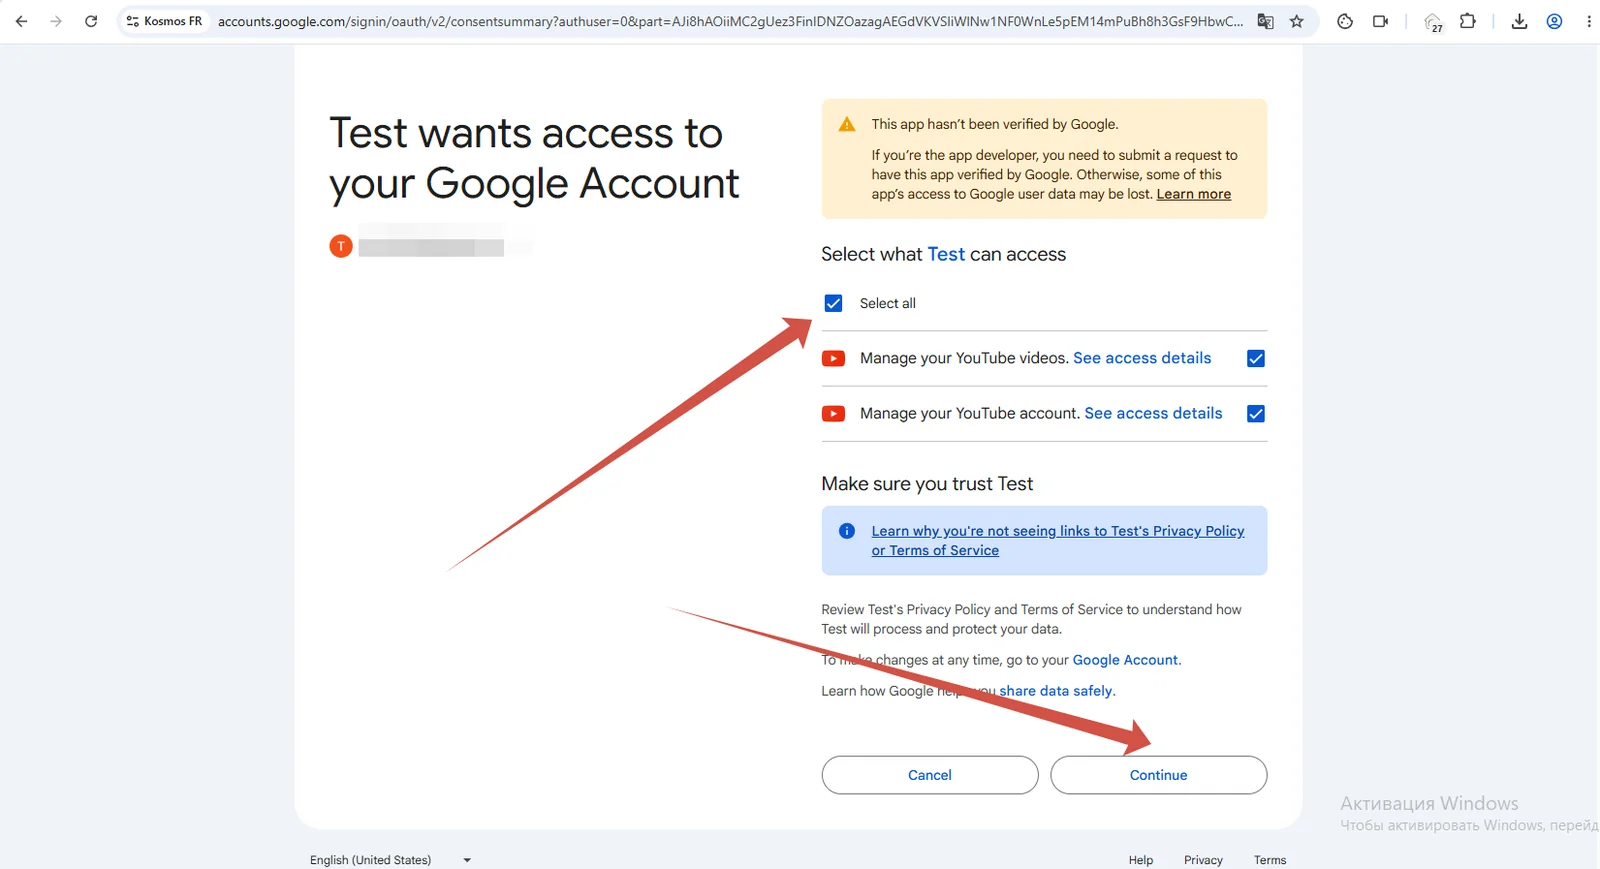
Tick Select all — both YouTube permissions get checked — and click Continue.
Step 27. Copy the address from the browser
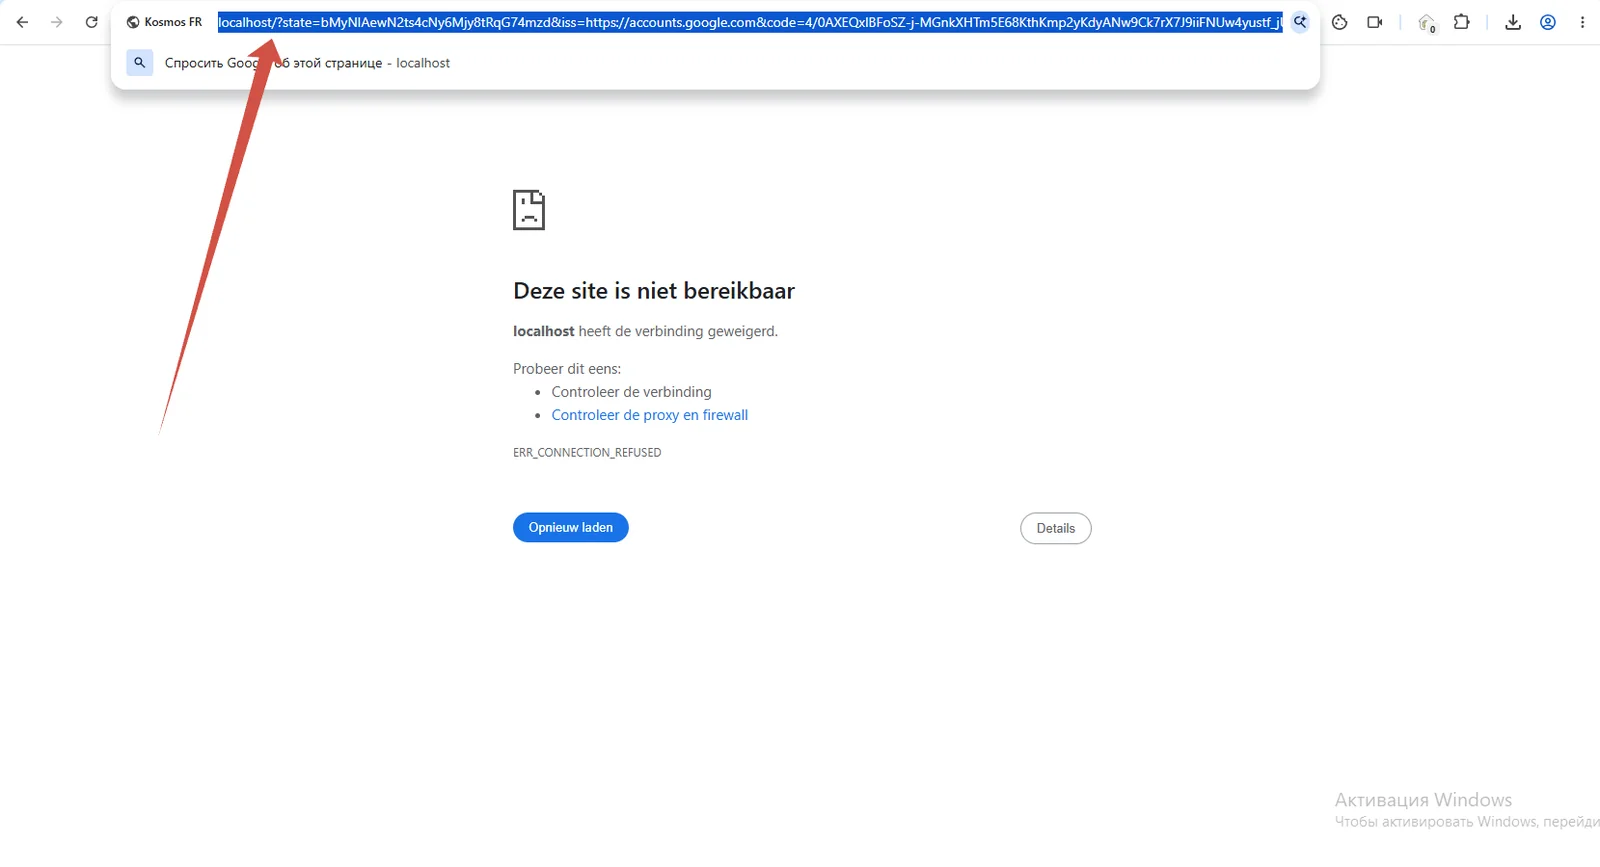
The browser will try to open a page starting with localhost and show an error — that's expected, this page isn't supposed to load.
Copy the entire link from the address bar.
Step 28. Paste the link into the app
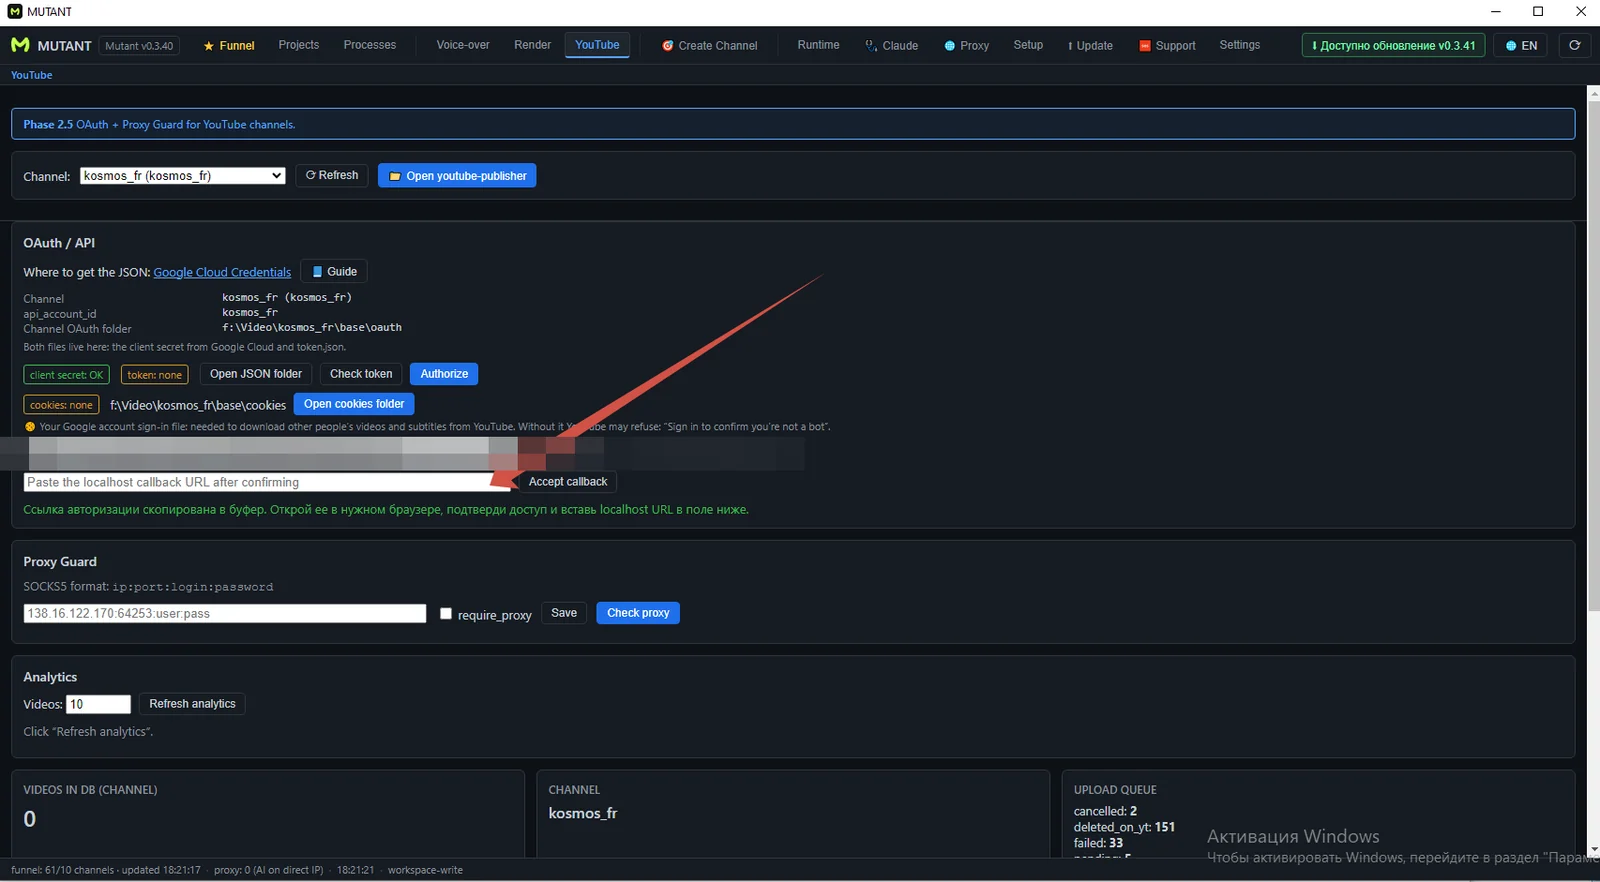
Go back to Mutant, paste the copied link into the field under the channel (labeled "Paste the localhost callback URL after confirming") and click Accept callback.
Step 29. Done — authorization complete
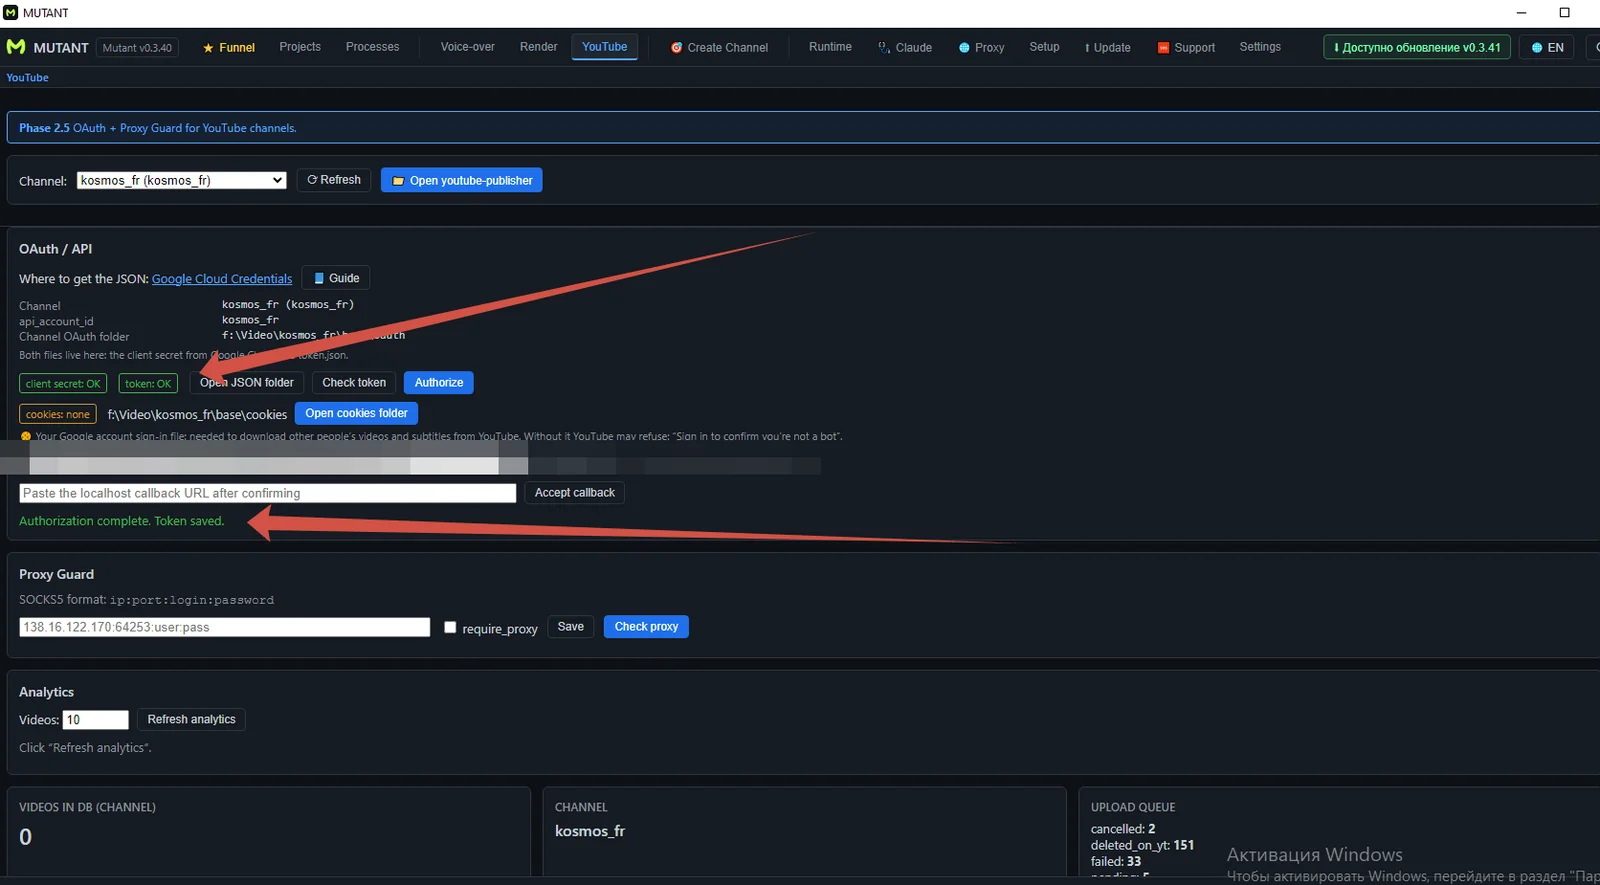
If everything went right, you'll see a green line: Authorization complete. Token saved. — the OAuth part is done.
Step 30. Install the cookies extension
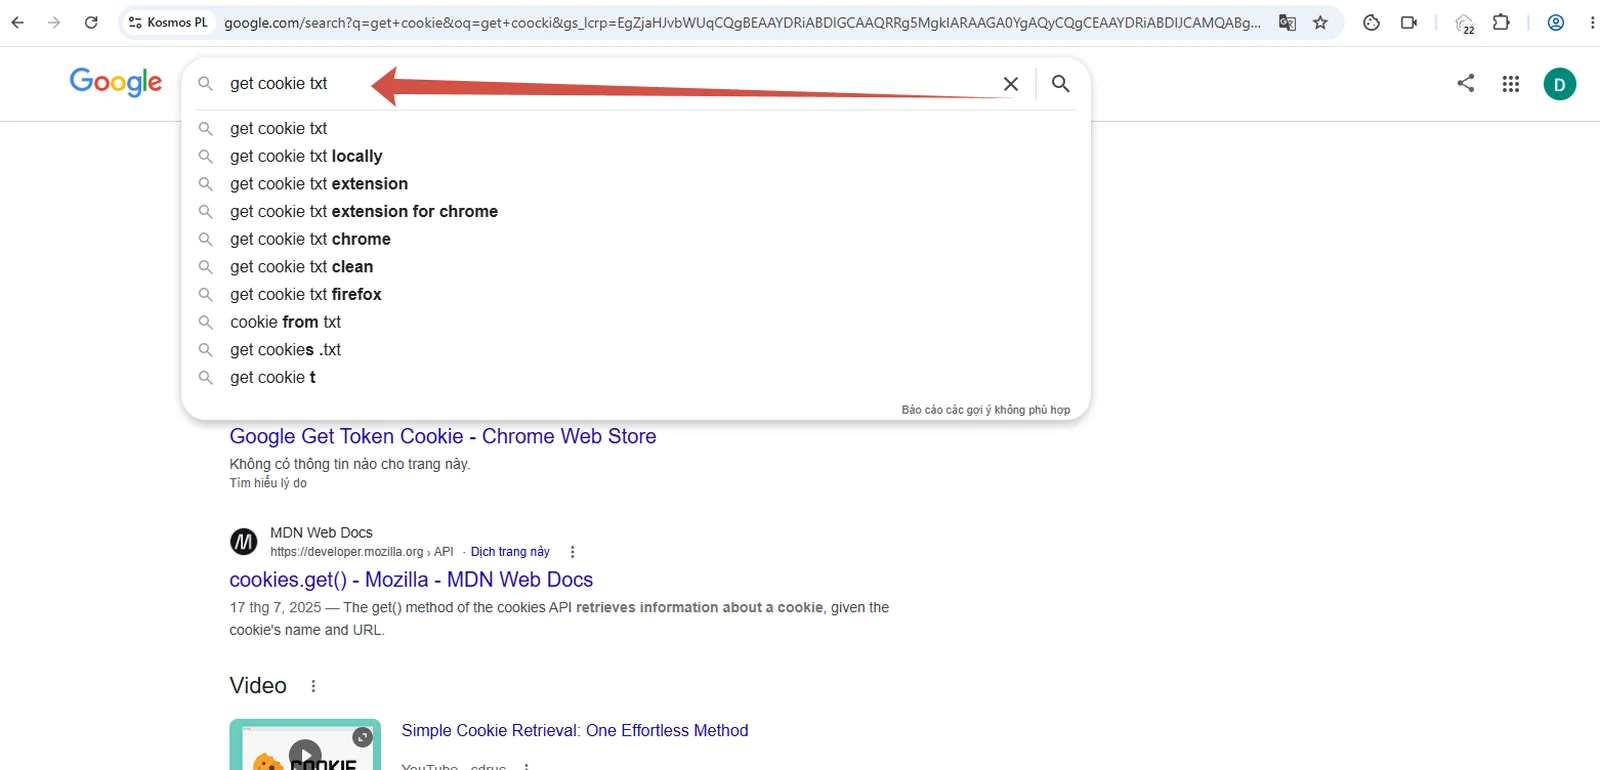
Now you need to add this channel's cookies. In the same browser where the channel is signed in, search for get cookie txt.
Step 31. Add the extension to your browser
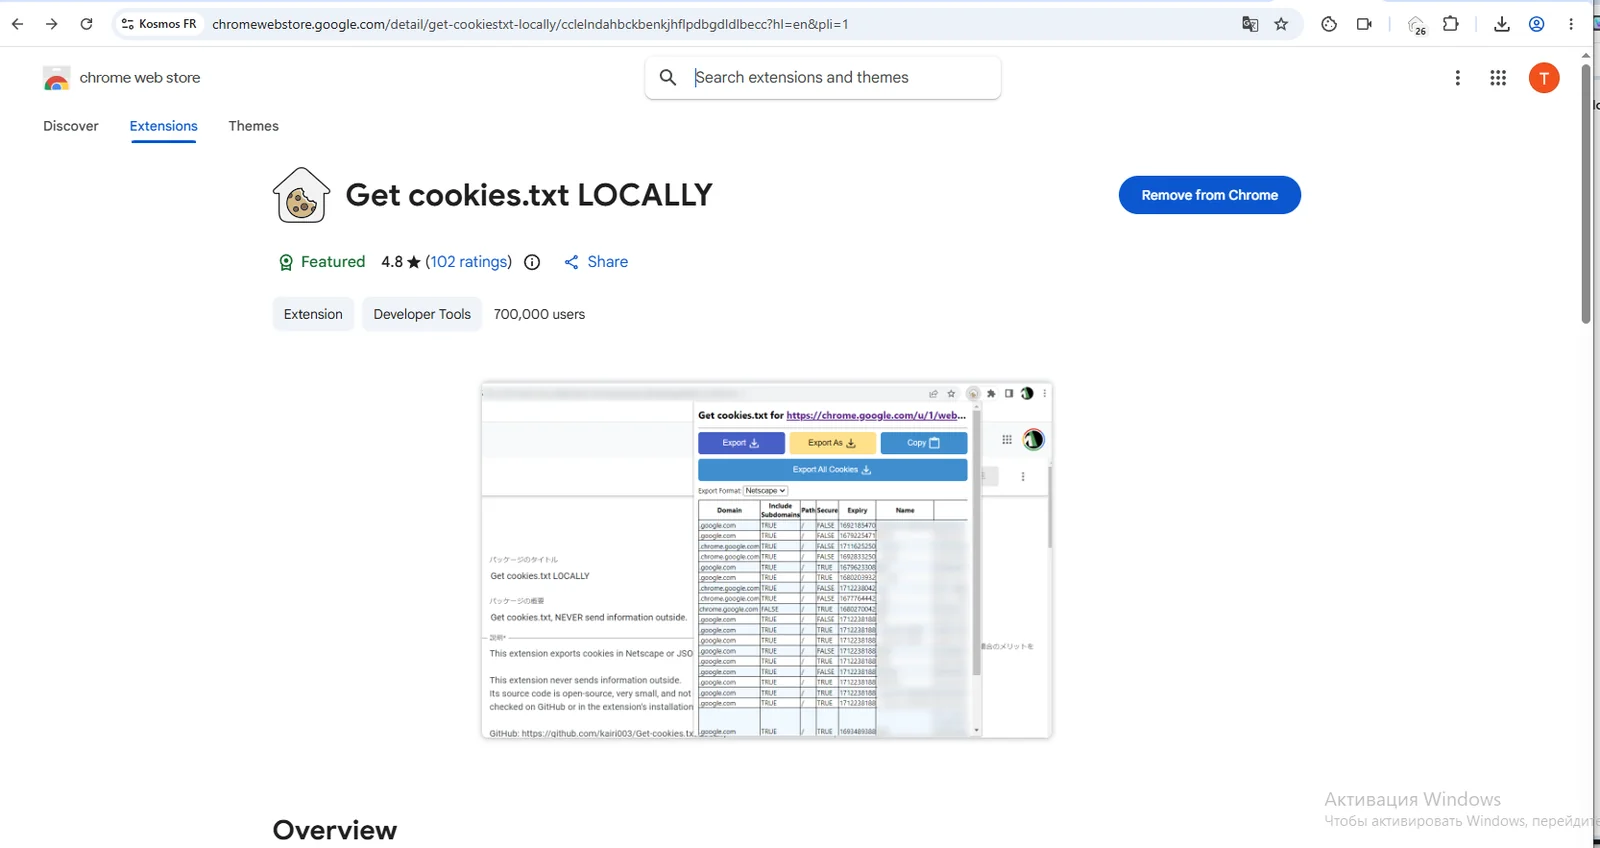
Open the Get cookies.txt LOCALLY extension page in the Chrome Web Store and install it.
Step 32. Open YouTube and launch the extension
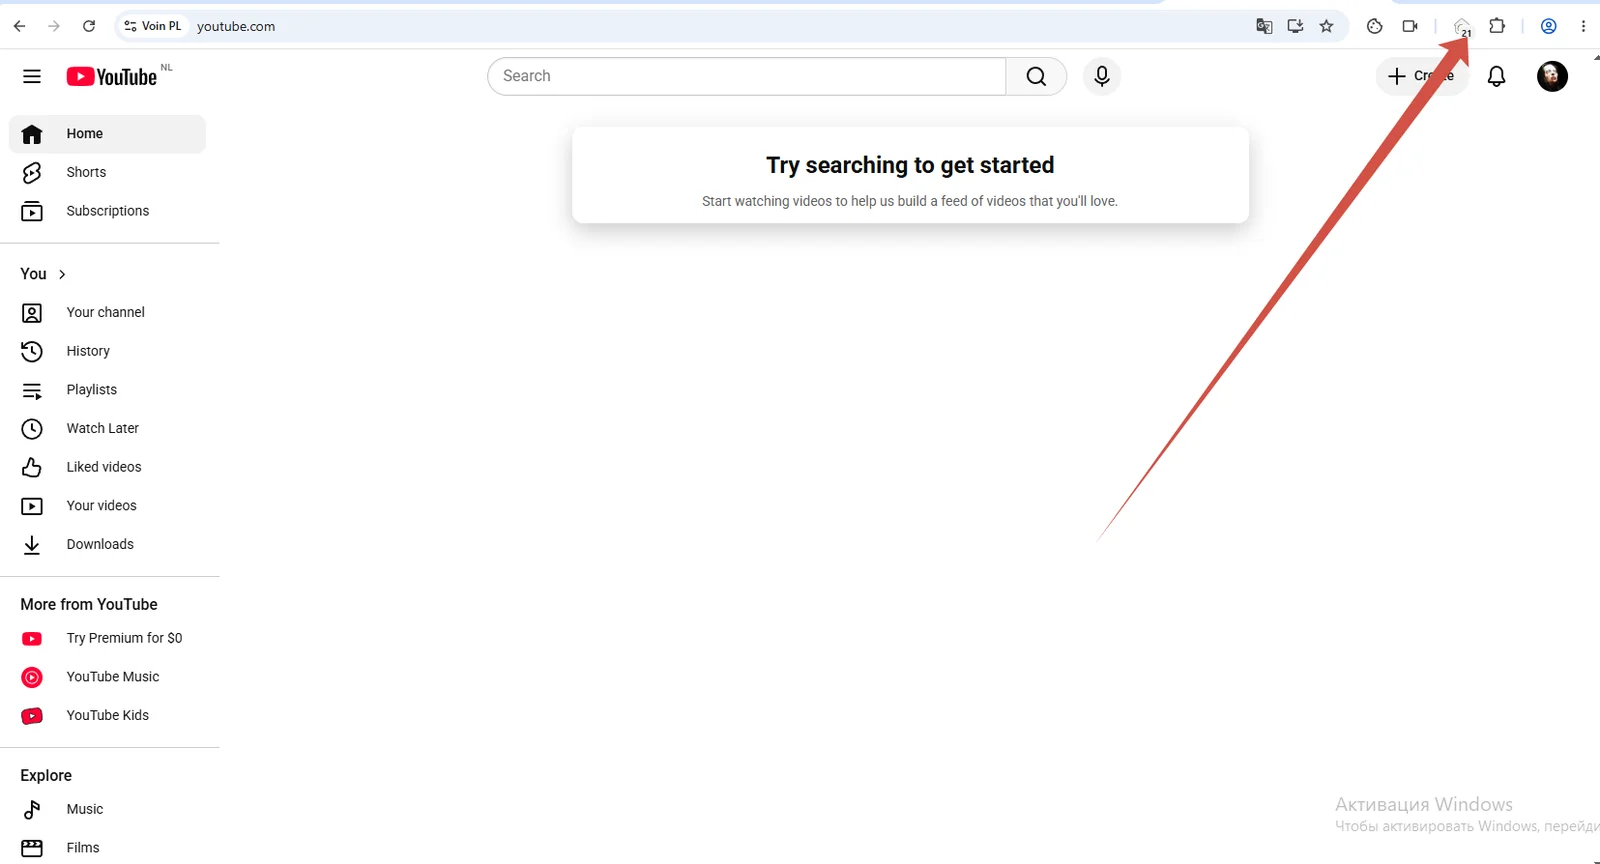
Go to youtube.com signed in as the right account. A house-shaped icon appears in the extensions bar — if you don't see it, pin it via the puzzle-piece icon, then click it.
Step 33. Export cookies as JSON
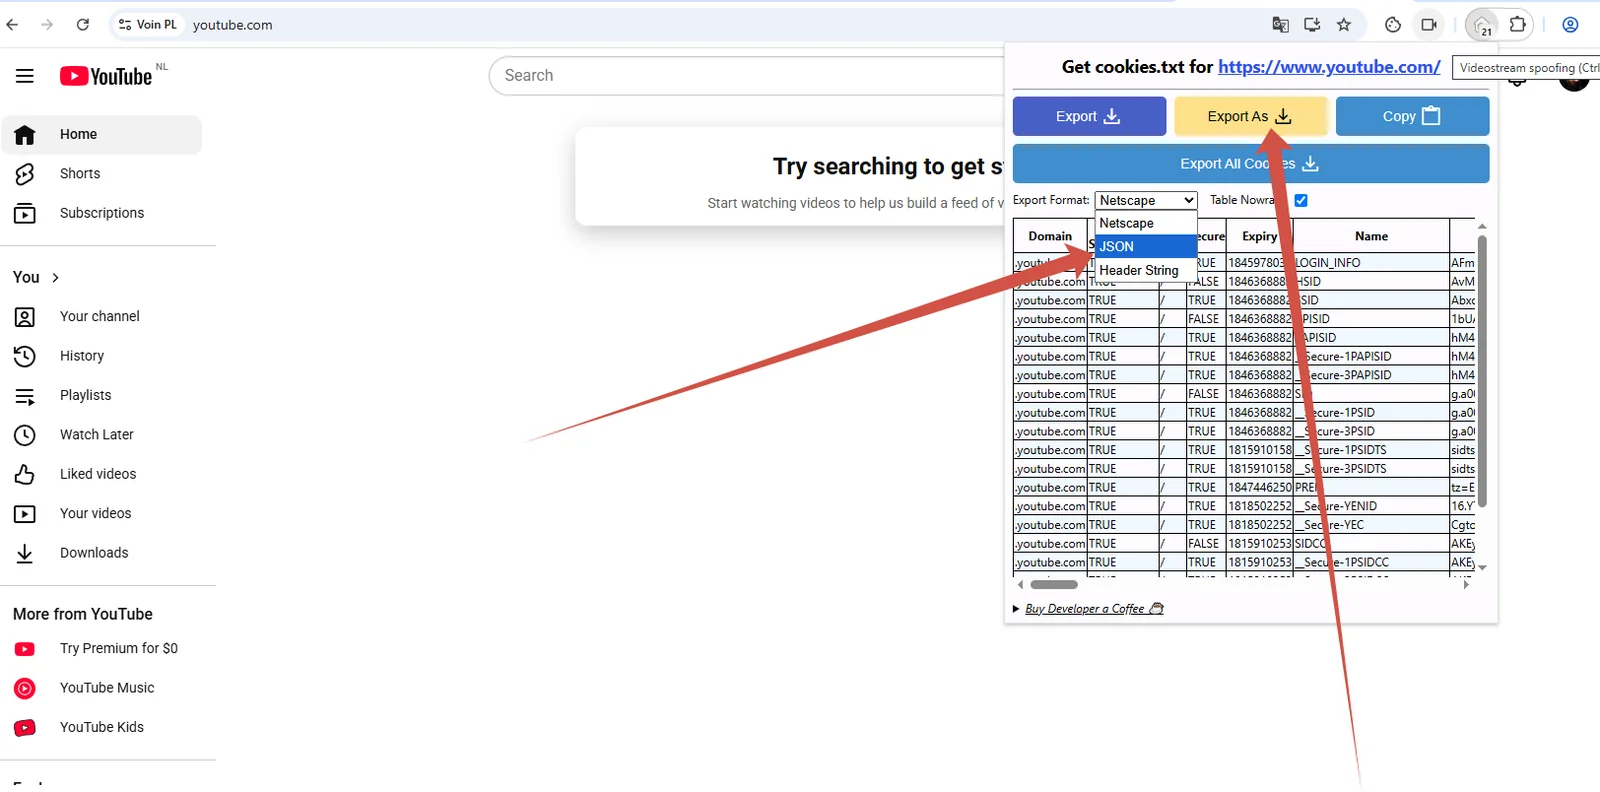
In the extension window pick JSON from the Export Format list and click Export As.
The file downloads — move it into the cookies folder inside your channel's folder.
Step 34. Refresh the channel in the app — done
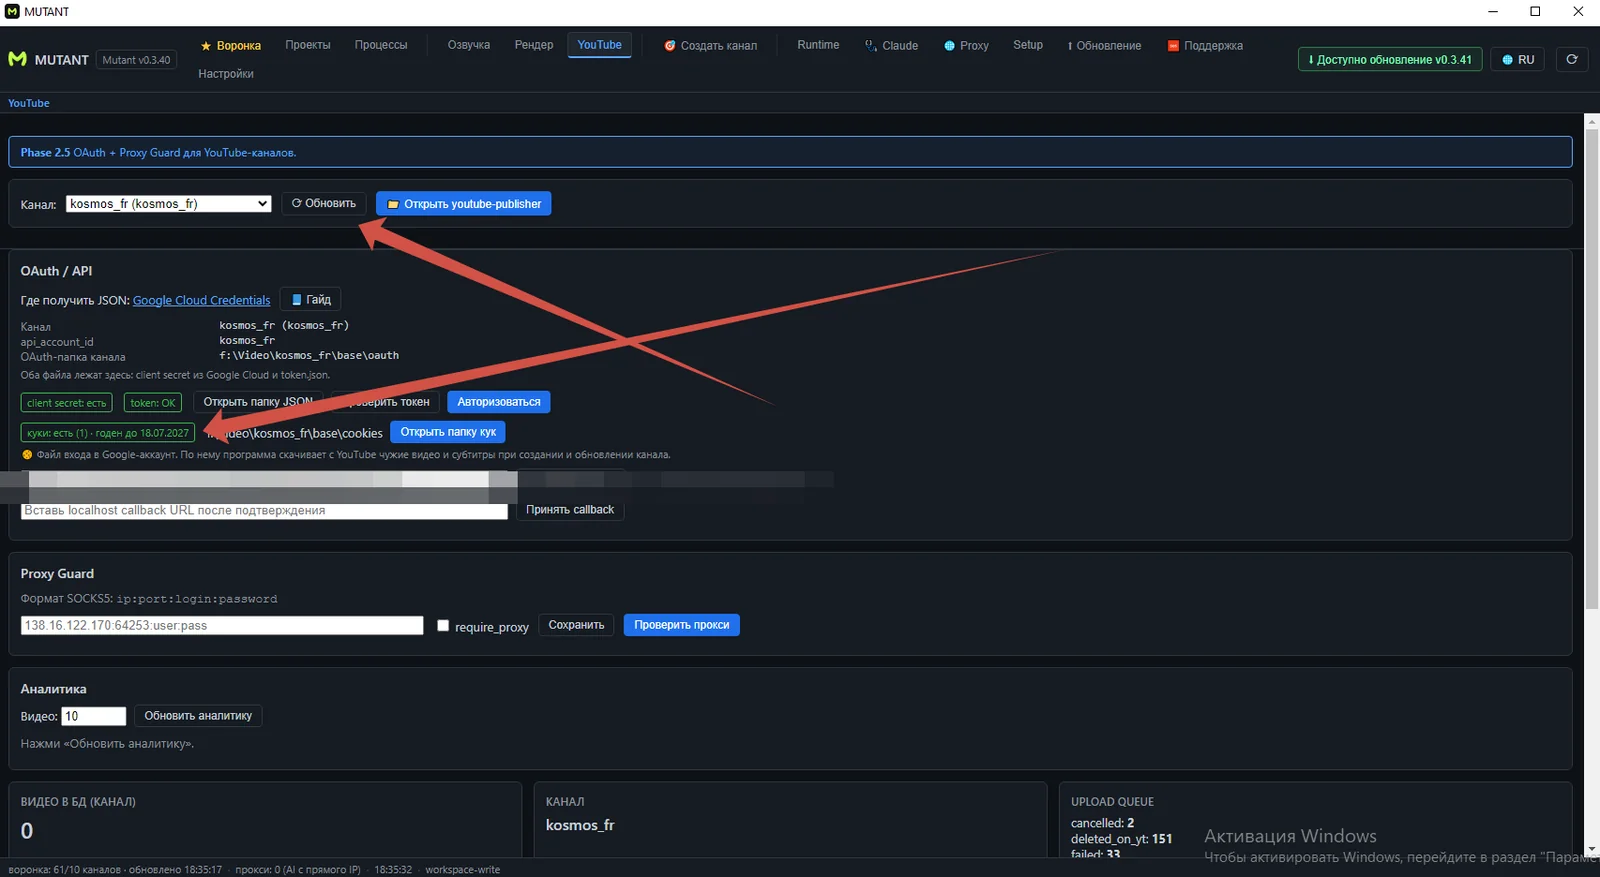
Go back to Mutant and click Refresh. If everything's set up right, the line cookies: yes (1) · valid until … turns green.
The channel is fully connected — you can now publish videos from the Projects and Funnel tabs.